# Our Hosting Docs
This documentation is written to help edropin Hosts navigate the hosting side of edropin and to deliver exceptional courses and events to our community. This page will focus on hosts who are using edropin to create courses, deliver CE and sell tickets to events. If you are interested in attending events or taking CE and looking to get started, please see our Guest Guide.
Quick Note: You can use the links in the sidebar to quickly jump between topics.
# Prologue
# Our Promise to you
We promise to serve you in every aspect of your dental journey. Our mission at edropin is much bigger than just event-planning. We are here to create and build incredible tools that aid you in challenging the status quo. We hope to empower you to grow our profession, and to foster a community of shared learning.
# Your promise to us
You promise to help us learn and improve by providing us with your honest and incredible feedback. We can only continue to grow through your love and kindness so if you hate something, please let us know right away. If you love something, let others know, so they can find pleasure in these things too. Thank you for being part of our edropin family.
Saj, Sanjay and Sunil
Founders @ edropin
# Start Hosting
# What is hosting?
When you create an account on edropin, your account has access to all guest services such as buying tickets to events, watching content on the edropin video library, earning certificates and setting up your memberships. If you want to create events on edropin, you will have enable hosting on your edropin account.
# Is your current account right for hosting?
Before you enable hosting on your account, make sure your account represents the right event owner. For instance, if you have a dental education company that hosts events, do not enable hosting under your personal account. It is better to create a new account for your dental education company with the appropriate email e.g. dentaledu@example.com and then enable hosting under this new account. This will keep your personal certificates and invoices that you earn on your account separate from your professional hosting account. Furthermore, you may be rejected during the edropin review process if you enable hosting on personal accounts.
# Become a host
- Visit the Hosting page
- Click Start Hosting.
- If you aren't logged in, you will be prompted to sign in. You can also create your account in this step.
- Select the plan that is right for you.
- Starter plan is great for small to moderate sized organizations, hosting 20-30 events a year with guest lists of up to 500.
- Professional plan is for organizations looking to host larger events (500+) and want to get advanced analytics as well as customized emails.
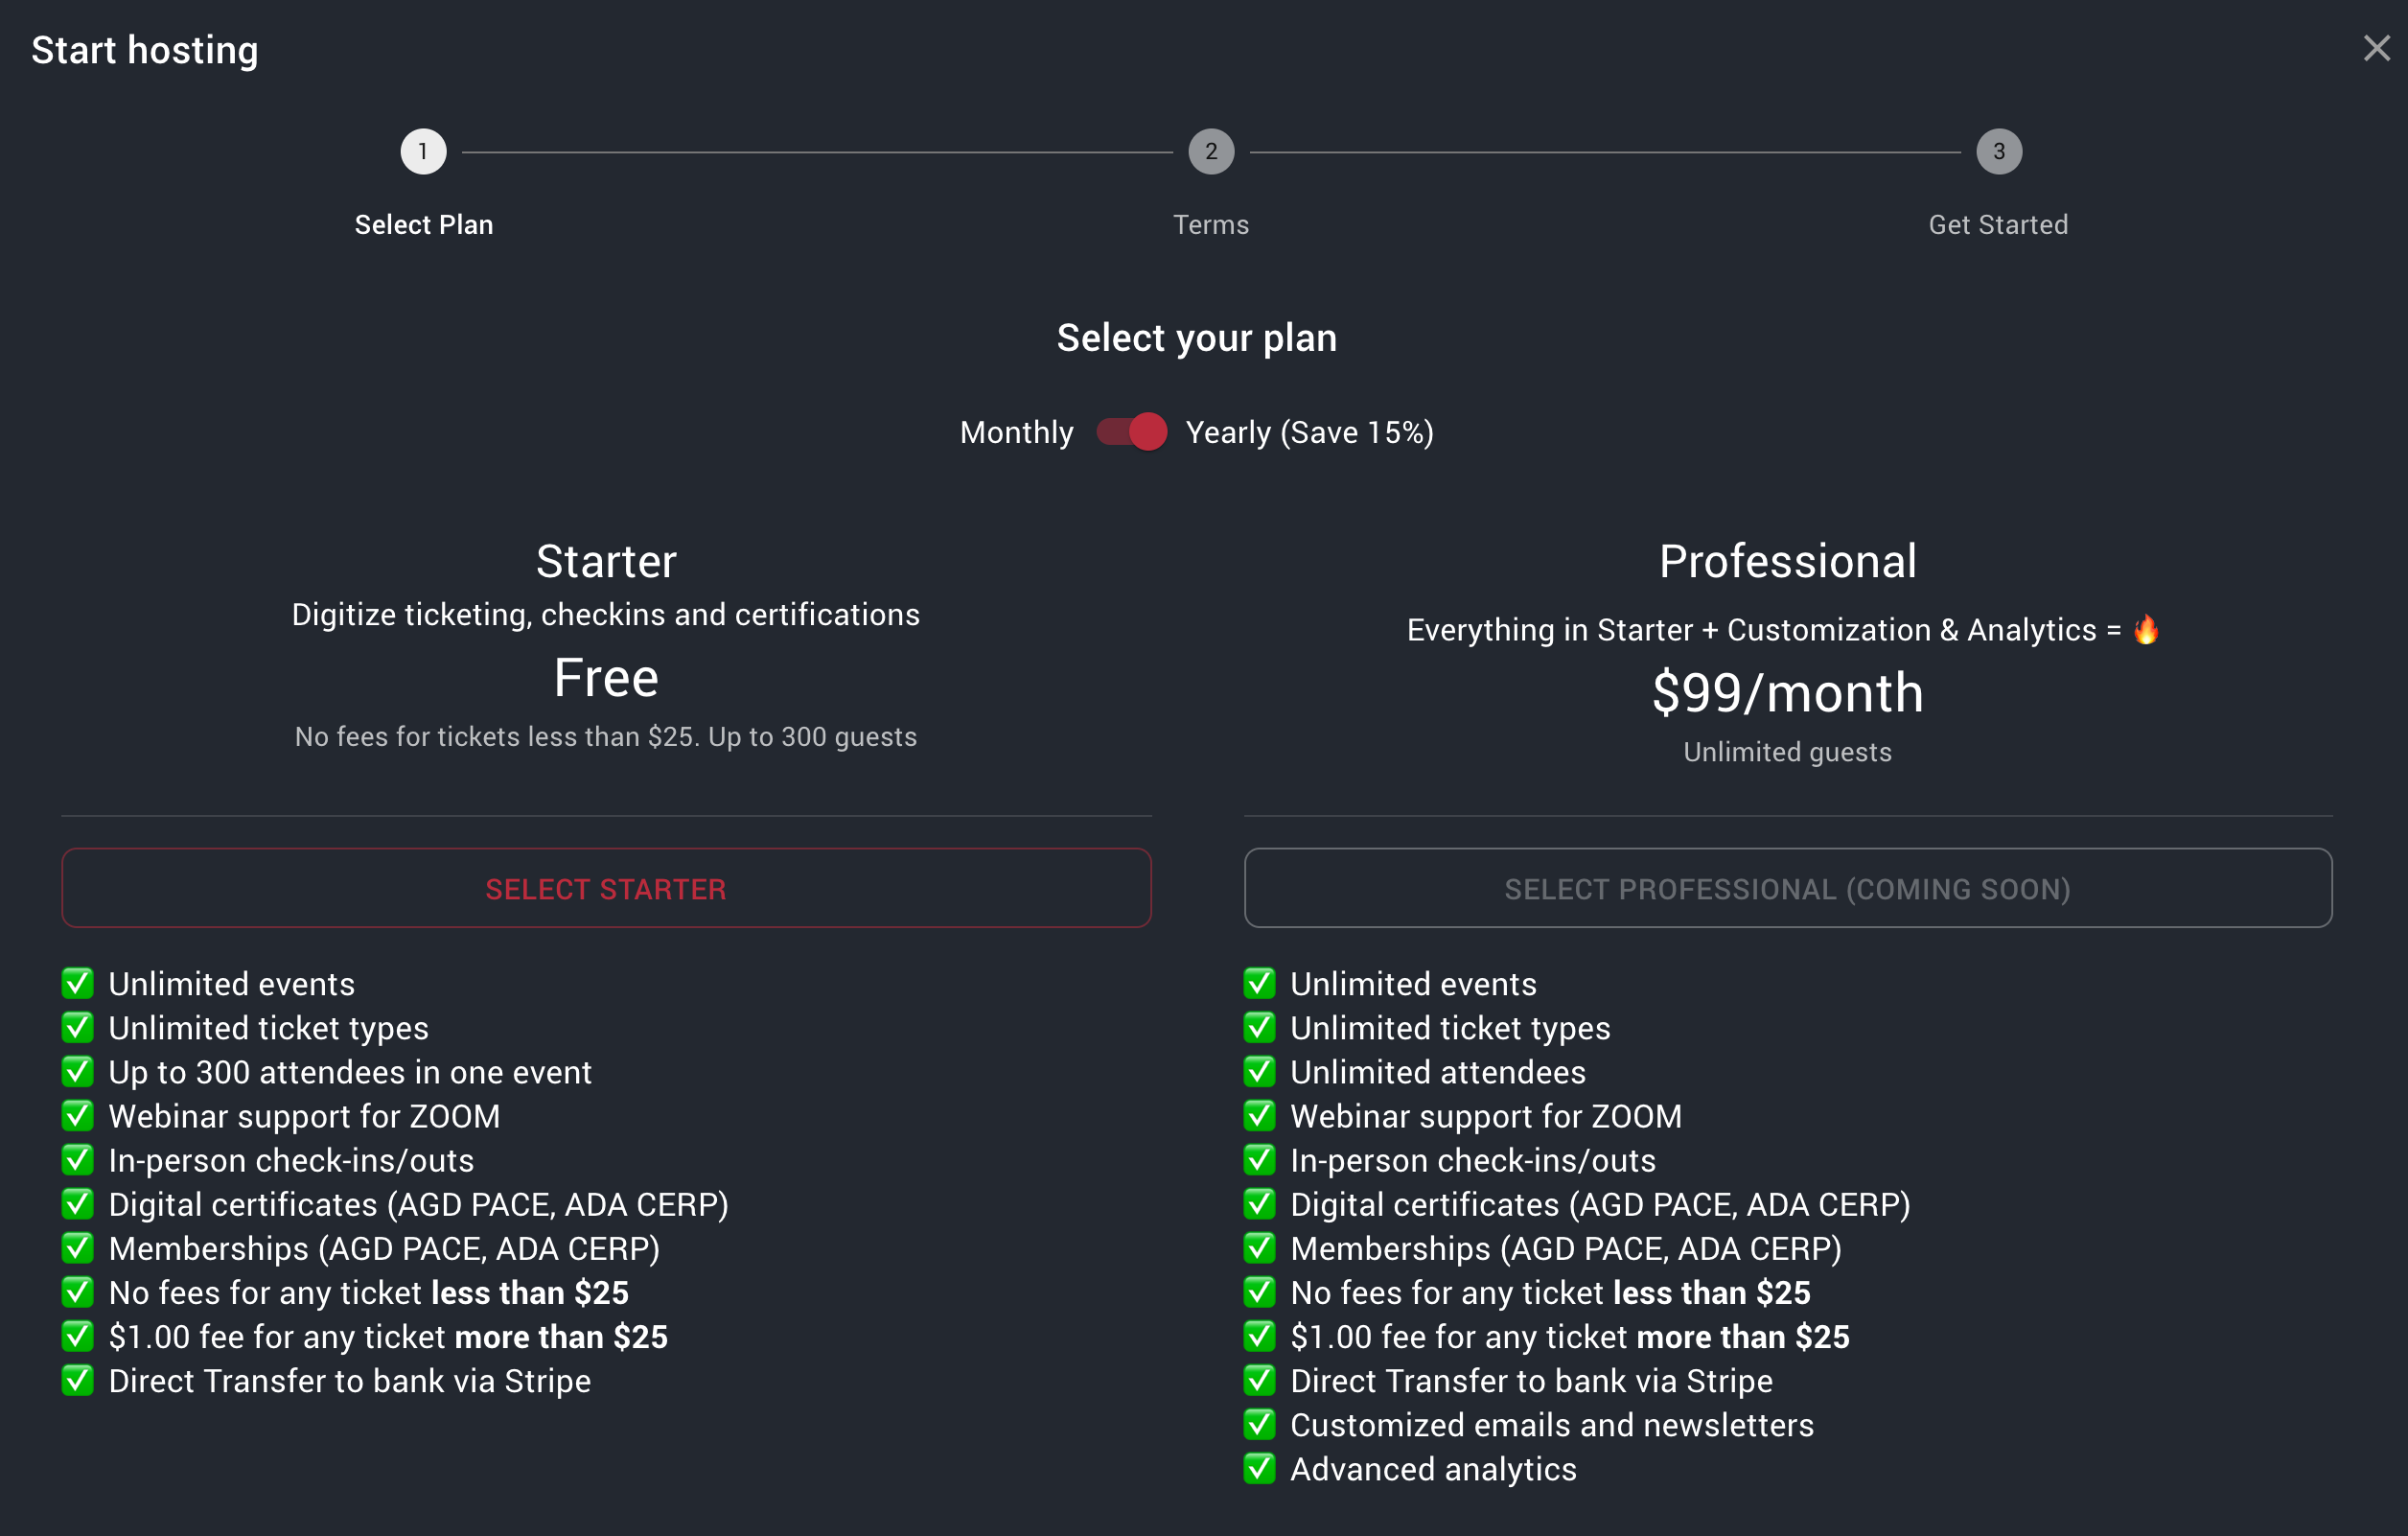
edropin hosting plans for organizing your events
- Accept the terms of agreement for hosting on edropin.
- If you get a message asking you to verify your account. Please check your email for a message from edropin with your verification code.
- If you are not able to find the email, you can always visit http://live.edropin.com/me to send a new verification email.
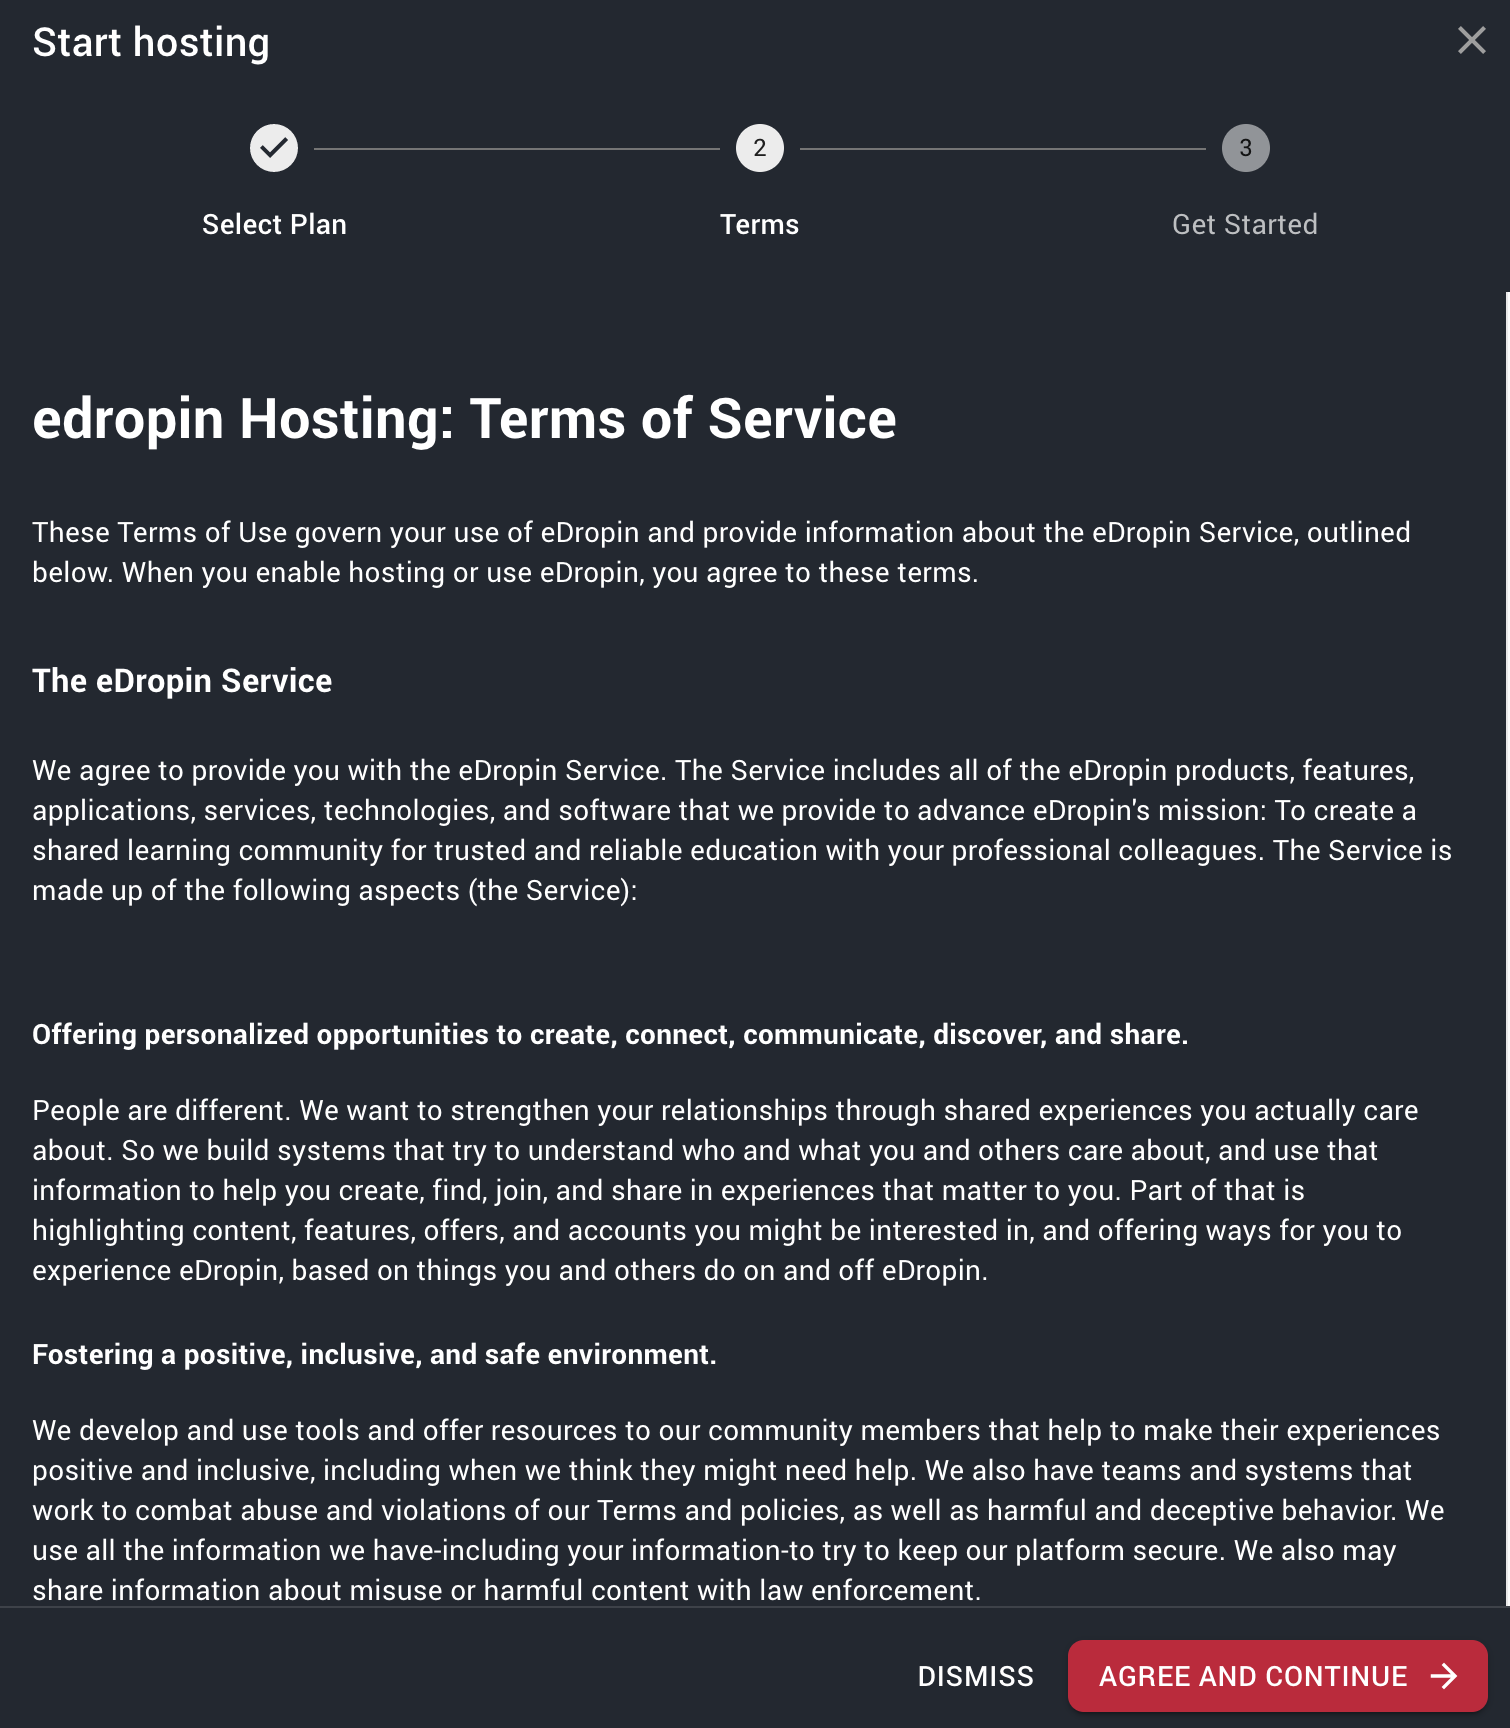
edropin hosting agreement
- After agreeing to the terms, you will be reviewed by the edropin team for hosting. We may be in touch with you via email to confirm any required details.
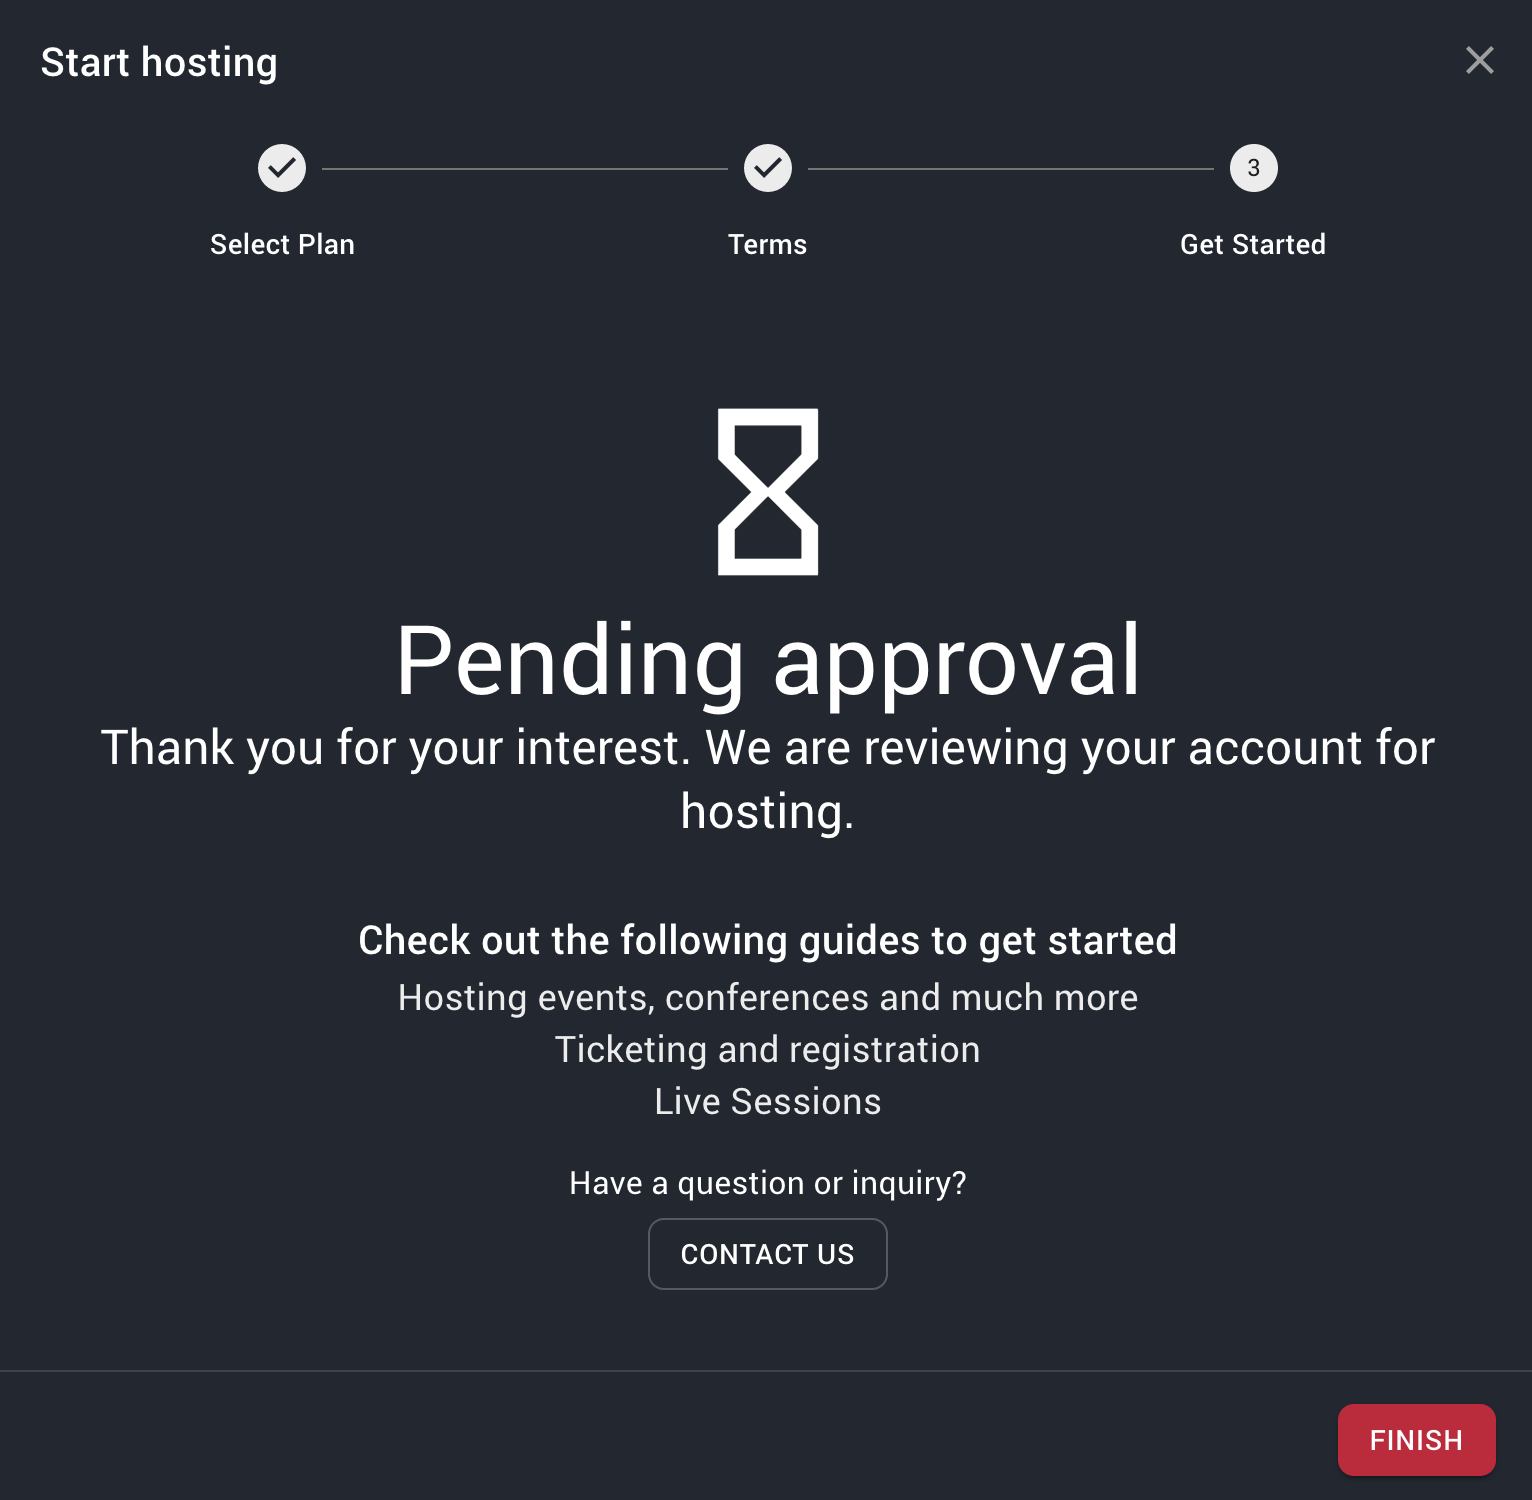
Your hosting account is under review from the edropin team
# Welcome to hosting
Hey congratulations, you getting approved for hosting on edropin. Your account will now have access to additional features that will help you create events, set up Zoom and In-Person sessions, manage sales, create and assign CE certificates and much more.
There are 3 key concepts at edropin that will help you use the platform effectively.
# Navigation in edropin
edropin on the web uses a sidebar layout which means a lot of the links to various edropin services are located in the Sidebar. On large screens, the sidebar is always visible.
On smaller screens, the sidebar can be opened and closed by using the Hamburger Button in the Header.

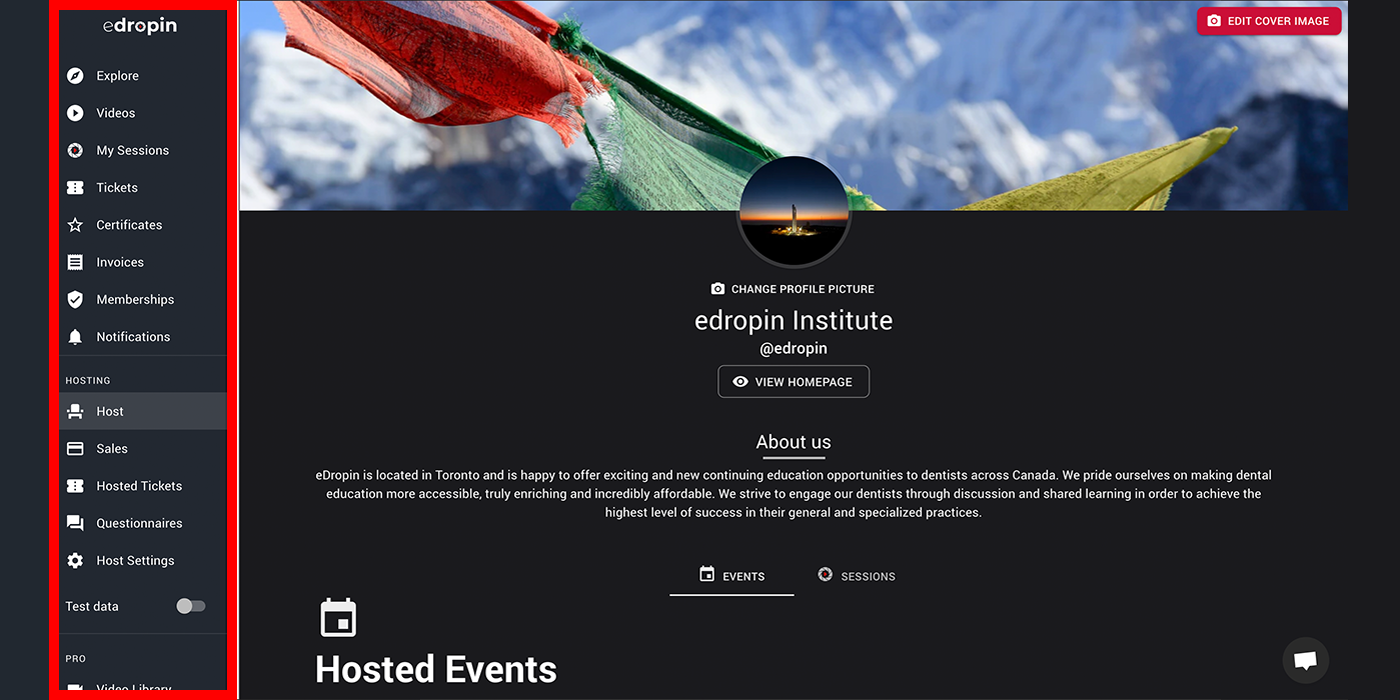
# Sidebar
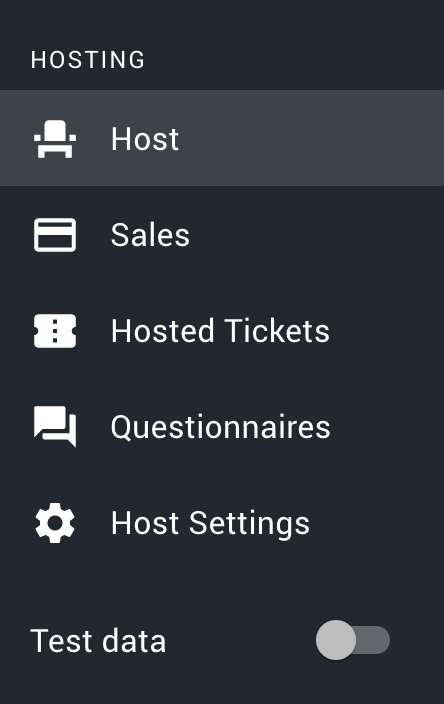
When you are approved for hosting, your sidebar will have new links added that will let you access hosting-related parts of edropin.
# Header
The header in edropin is hidden on large screens but on smaller screen helps you open the Sidebar and also access your account page.

# Events
# What is an edropin event?
An edropin event is an online or in-person seminar, conference or meeting that happens at a set point in time. Examples of event include a virtual Course on September 25 8:00 AM, Dental Conference for 2 weeks in October, and a private meeting for the board on December 21st at 7:00 PM.
# Create Event using the Event Wizard
Go to the hosting page
Click "CREATE EVENT"
Select the type of event
- Webinar: This event is used for connecting guests online e.g. using a Zoom meeting. Great for online courses and meetings.
- In-Person Seminar: Traditional events that are held at a real-world location.
- Series/Conference: Choose this option to group several events together. These events can be either virtual or in-person and they are usually connected in context. e.g. a lecture series or a national conference. See Creating a Series/Conference for more details.
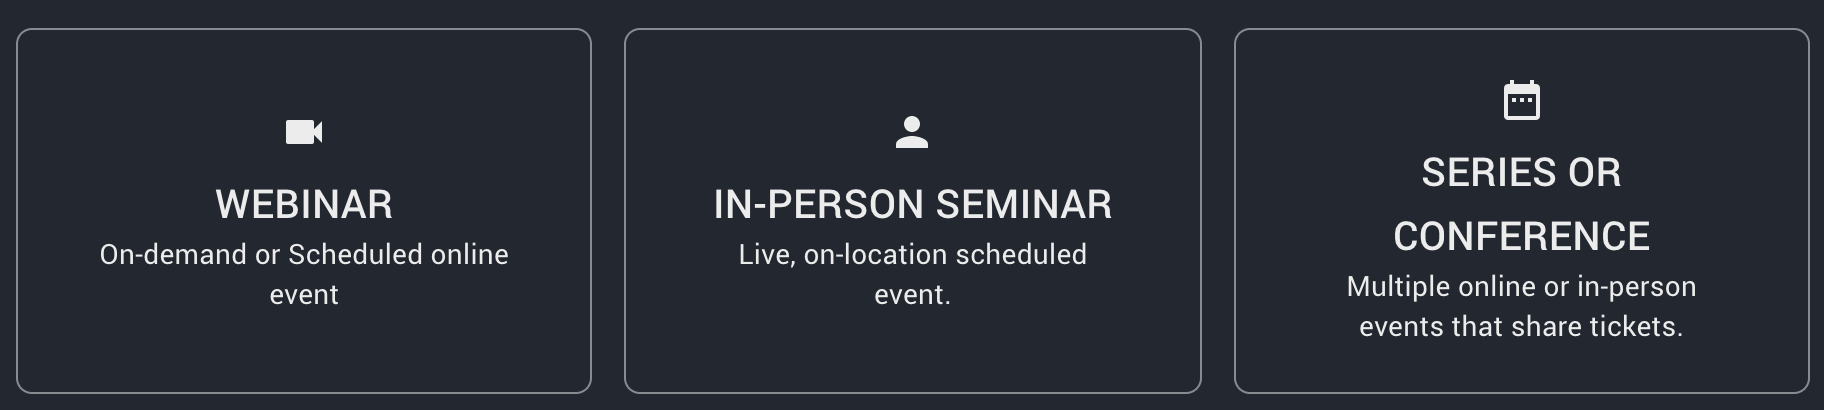
3 Event types to select from when creating a new event
Fill in the details for the event such as the:
- Event Picture (Optional): It is highly recommended that you upload an event picture to feature your event. Guests tend to be more interested in registering when there is a nice photo. We recommend an image aspect ratio of 2:1 (1920px x 1080px). You can use a tool like PIXLR online to help you create a nice event image.
- Event name (Required): Simply the event name (Limited to 200 characters)
- Community (Required): Pick the right community (e.g. Dental, Dental Hygiene). This will help us target the right audience for your event on the Explore page.
- Select a Series/Conference: This option will only show up if you are creating a Series/Conference event.
- Select either an existing series/conference to link this event or create a new series/conference if this is the first event you are creating in the series.
- Is this event in-person?: This option will only show up if you are create a Series/Conference event.
- You can create virtual or in-person events within one series/conference
- Start date (Required): Select the start date/time for this event
- End date (Required): Select the end date/time for this event
- Timezone (Required): edropin will use your current timezone by default, you can change this if your in-person event takes place in a different timezone.
- Short Description (Optional): Tell your guests a little more about this event (Limited to 15,000 characters)
- Event Location(Optional): This will only show up if you are creating a In-Person Serminar or if you toggle "Is this event in-person?" for a Series/Conference type of event.
- Use the Google Autocomplete feature, to quickly add a location to your event.
Click "CREATE EVENT"
- If your event is not created, make sure you check any fields marked in red.

# Setup tickets in Event Wizard
When you are Creating a new event, you will be using the event wizard. Let us setup tickets for your new event on the second step of the Event Wizard.
Note: If your event is part of series/conference jump to Setup tickets in Event Wizard for Series
- On the Registration step of the Event Wizard, click "CREATE TICKET"
- Fill in the details for your new ticket:
- Ticket Name (Required): Give your ticket a name that is easy to relate to your event. e.g. (Event Name - General admission). This is important because on guest invoice, your ticket name will be shown without the event and if you give a generic name like "General admission" the user may not know which event this ticket is related with.
- Ticket Price (Required): Set the price for your ticket. If you want to offer a free ticket then set the price to 0. Price can not be less than 0.
* Transaction fees: As edropin uses Stripe for all monetary transaction to securely and quickly deposit all money directly into your account, any charges will incur merchant fees set by Stripe. Please see Stripe Pricing for details.
- edropin fees Any ticket sold on edropin that is more than $25.00 will incur a $1.00 edropin service fee in addition to any an all Transaction Fees.
- All fees are deducted from the hosts payout and not added on top of the price. If you would like to pass these costs to your guests, then increase the ticket price to reflect the fees.
- Limit the total number of tickets (Optional): This switch allows you to control number of registrations for this ticket. If this switch is "off", total number of sales will not be limited. * When you turn this "on", you will have the ability to set the maximum number of tickets (must be greater than or equal to 0)
- Limit number of tickets per user (Optional): See note before turning this off This switch allows you to control the number of tickets each person can register under their account. If this switch is "off", a user can register for as many tickets as they like (limited by Total number of Tickets available).
- When you turn this "on", you can specify the total number of tickets each user can register.
- This setting is great in limiting guests from accidentally buying multiple tickets to your course or seminar.
- Is this ticket on-sale for a limited time? (Required): You can toggle this switch on/off to if you want to set a sale end time and a sale start time. Most events will have this switch set to "on"
- When you set this switch "on", you will have to specify a start sale date/time and an end sale date/time. Tickets will only be available for sale between the specified times.
- Short description (Optional): This is a great place to tell your guests more about what they are registering for. You can also use this space to include additional notes about extras and things that are included or not-included
- Click "CREATE TICKET"
- If your event is not created, make sure you check any fields marked in red.
This is to ensure that each professional keeps their CE Certificate and linked membership on their own account to avoid confusion and mis-assigning credits.
# Setup tickets in Event Wizard for Series
On edropin, tickets are created independently of any events. See What is a Ticket to understand why this is such a powerful feature. This means, that you can link the same ticket to multiple events and when guests purchase this ticket, they will get access to multiple events. This can be done on non-series and series events.
Let's use an example Conference to illustrate how Series/Conference can help you design your events. For our Example conference, we want to schedule 3 events and we want to give guests the ability to either register for each event invdividually for $20.00 or to register for all three events at the same time for $50.00 and save $10.00.
- Create a new Event from the Host Page and select type as "Series/Conference". See Create an Event to learn more about creating an event.
- Link this event to a "New Series/Conference" and name it "Test Series". You can choose the type to be Conference.
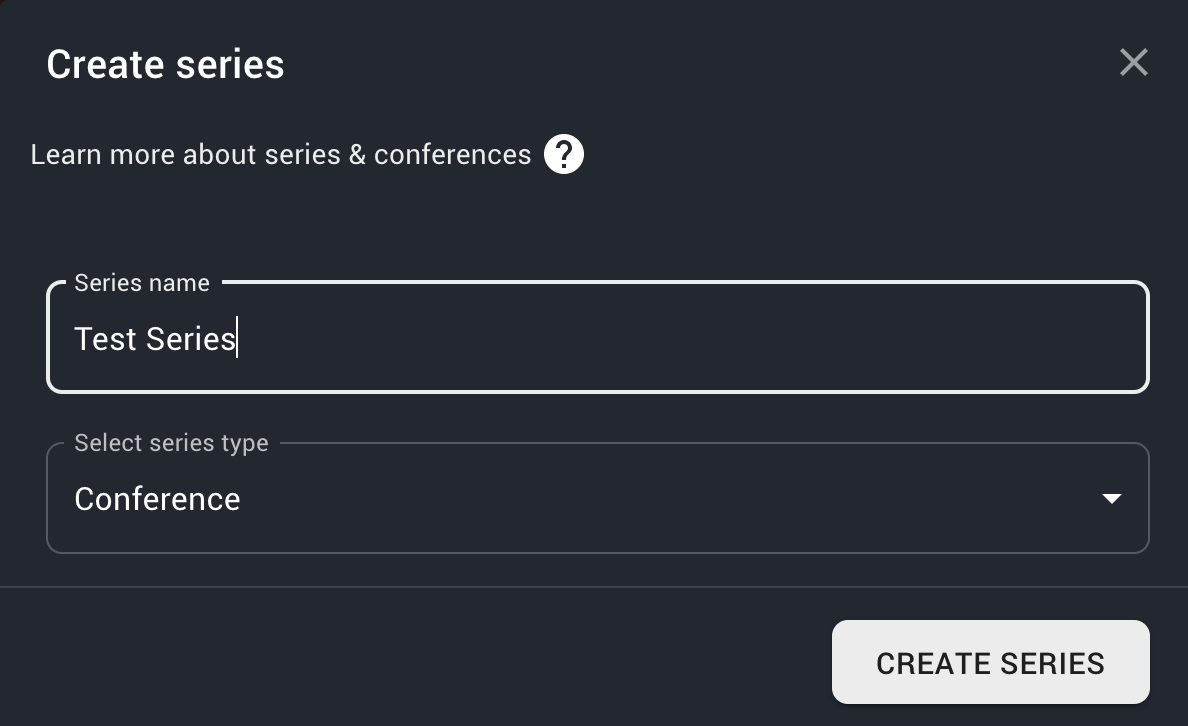
Create a new series for events
- Link this event to a "New Series/Conference" and name it "Test Series". You can choose the type to be Conference.
- On the second step for the wizard, you will now be greeted with a "Series Ticket" setup.
- Create a new Ticket with the name: "Example Conference - Access to all 3 Events" with a ticket price of $50.00
- Create a second Ticket with the name: "Example Conference - Only 1st event" with a ticket price of $20.00
- Create a new Ticket with the name: "Example Conference - Access to all 3 Events" with a ticket price of $50.00
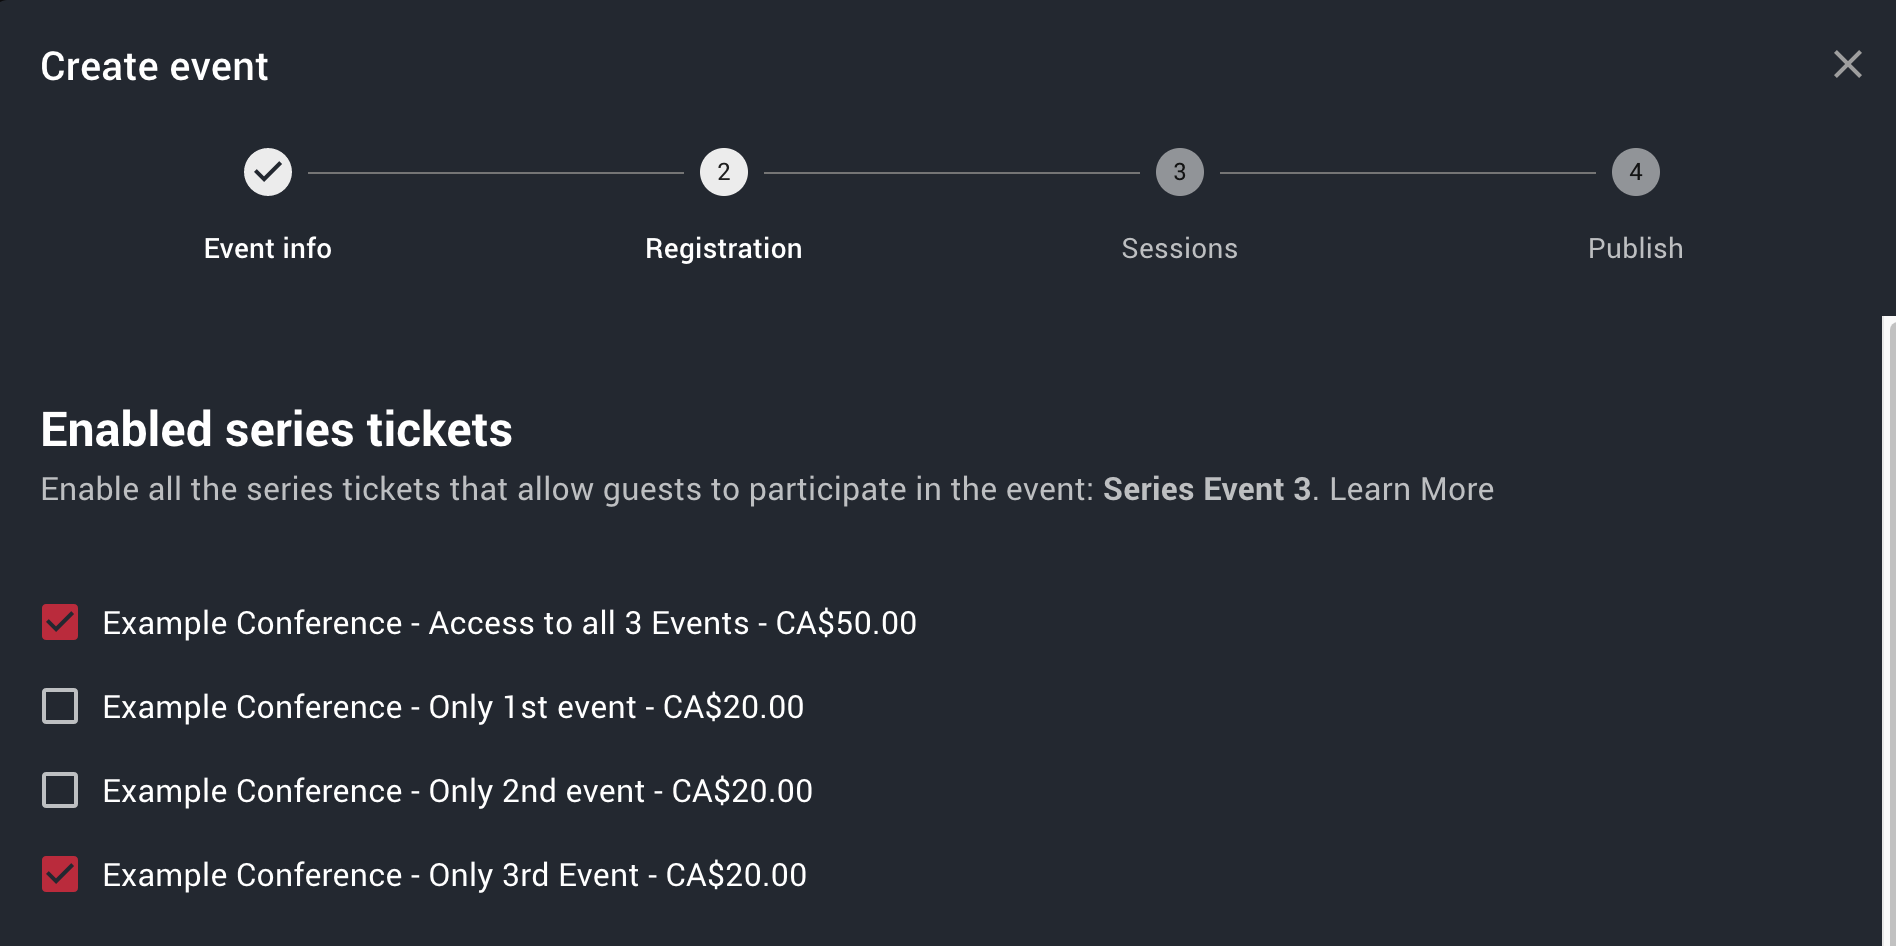
- You should now have two tickets in your series and both should be checked under "Enabled series tickets" for this 1st event
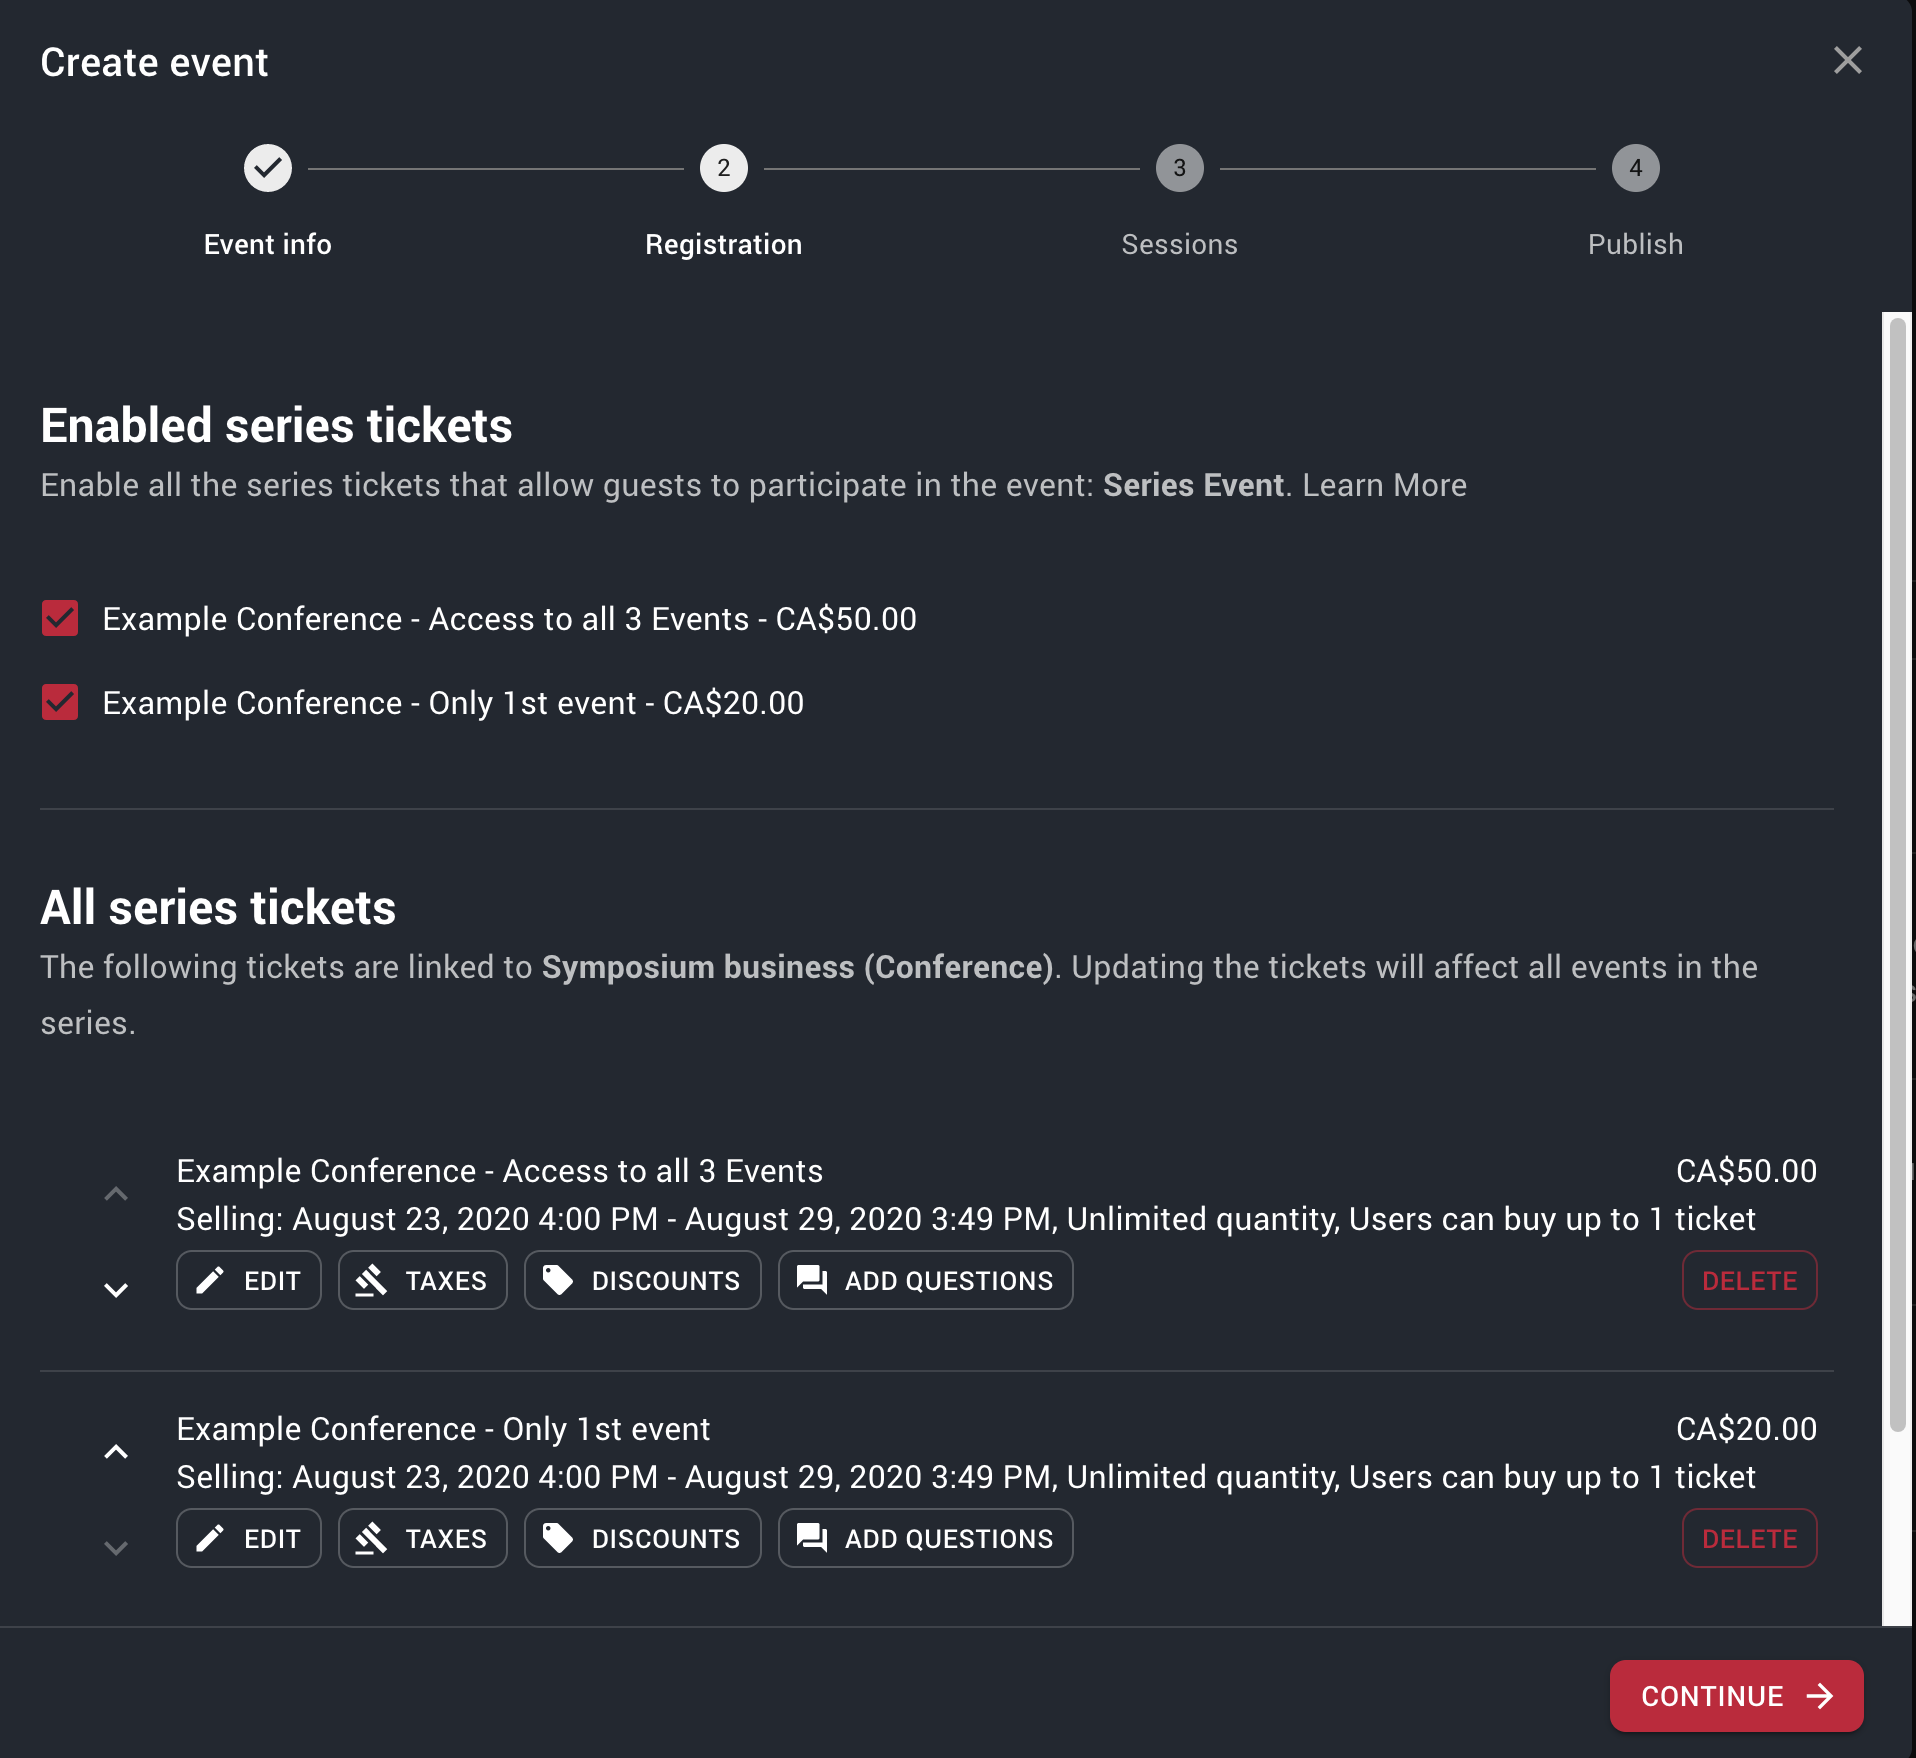
Event series ticket setup for the 1st event - Click CONTINUE (You can skip creating sessions for now) and continue again.
- On the Publish page, you can CLOSE the Event Wizard, so we can setup the second event (To learn more about publishing your event see How to publish an event).
- Let's Create our second Event. From the Host Page click CREATE AN EVENT and select type as "Series/Conference". Make sure you link this event to an existing series "Test Series" that we created above.
- Now on the second step for the wizard, you will see the two tickets that we linked to the series already.
- Create a new Ticket with the name: "Example Conference - Only 2nd event" with a ticket price of $20.00
- Under the "Enabled series tickets", make sure both the tickets: "Example Conference - Only 2nd event" and "Example Conference - Access to all 3 Events" are checked
Event series ticket setup for the 2nd event
- Click CONTINUE and you can skip over the next steps again and close the wizard.
- Lastly, let's Create our third and final event. Again, from the Host Page click CREATE AN EVENT and select type as "Series/Conference" and select "Test Series"
- On the Second step, you will see three tickets that we linked already.
- Create the last Ticket to just buy this course: "Example Conference - Only 3rd event" with a ticket price of $20.00
- Under the "Enabled series tickets", make sure both the tickets: "Example Conference - Only 3rd event" and "Example Conference - Access to all 3 Events" are checked
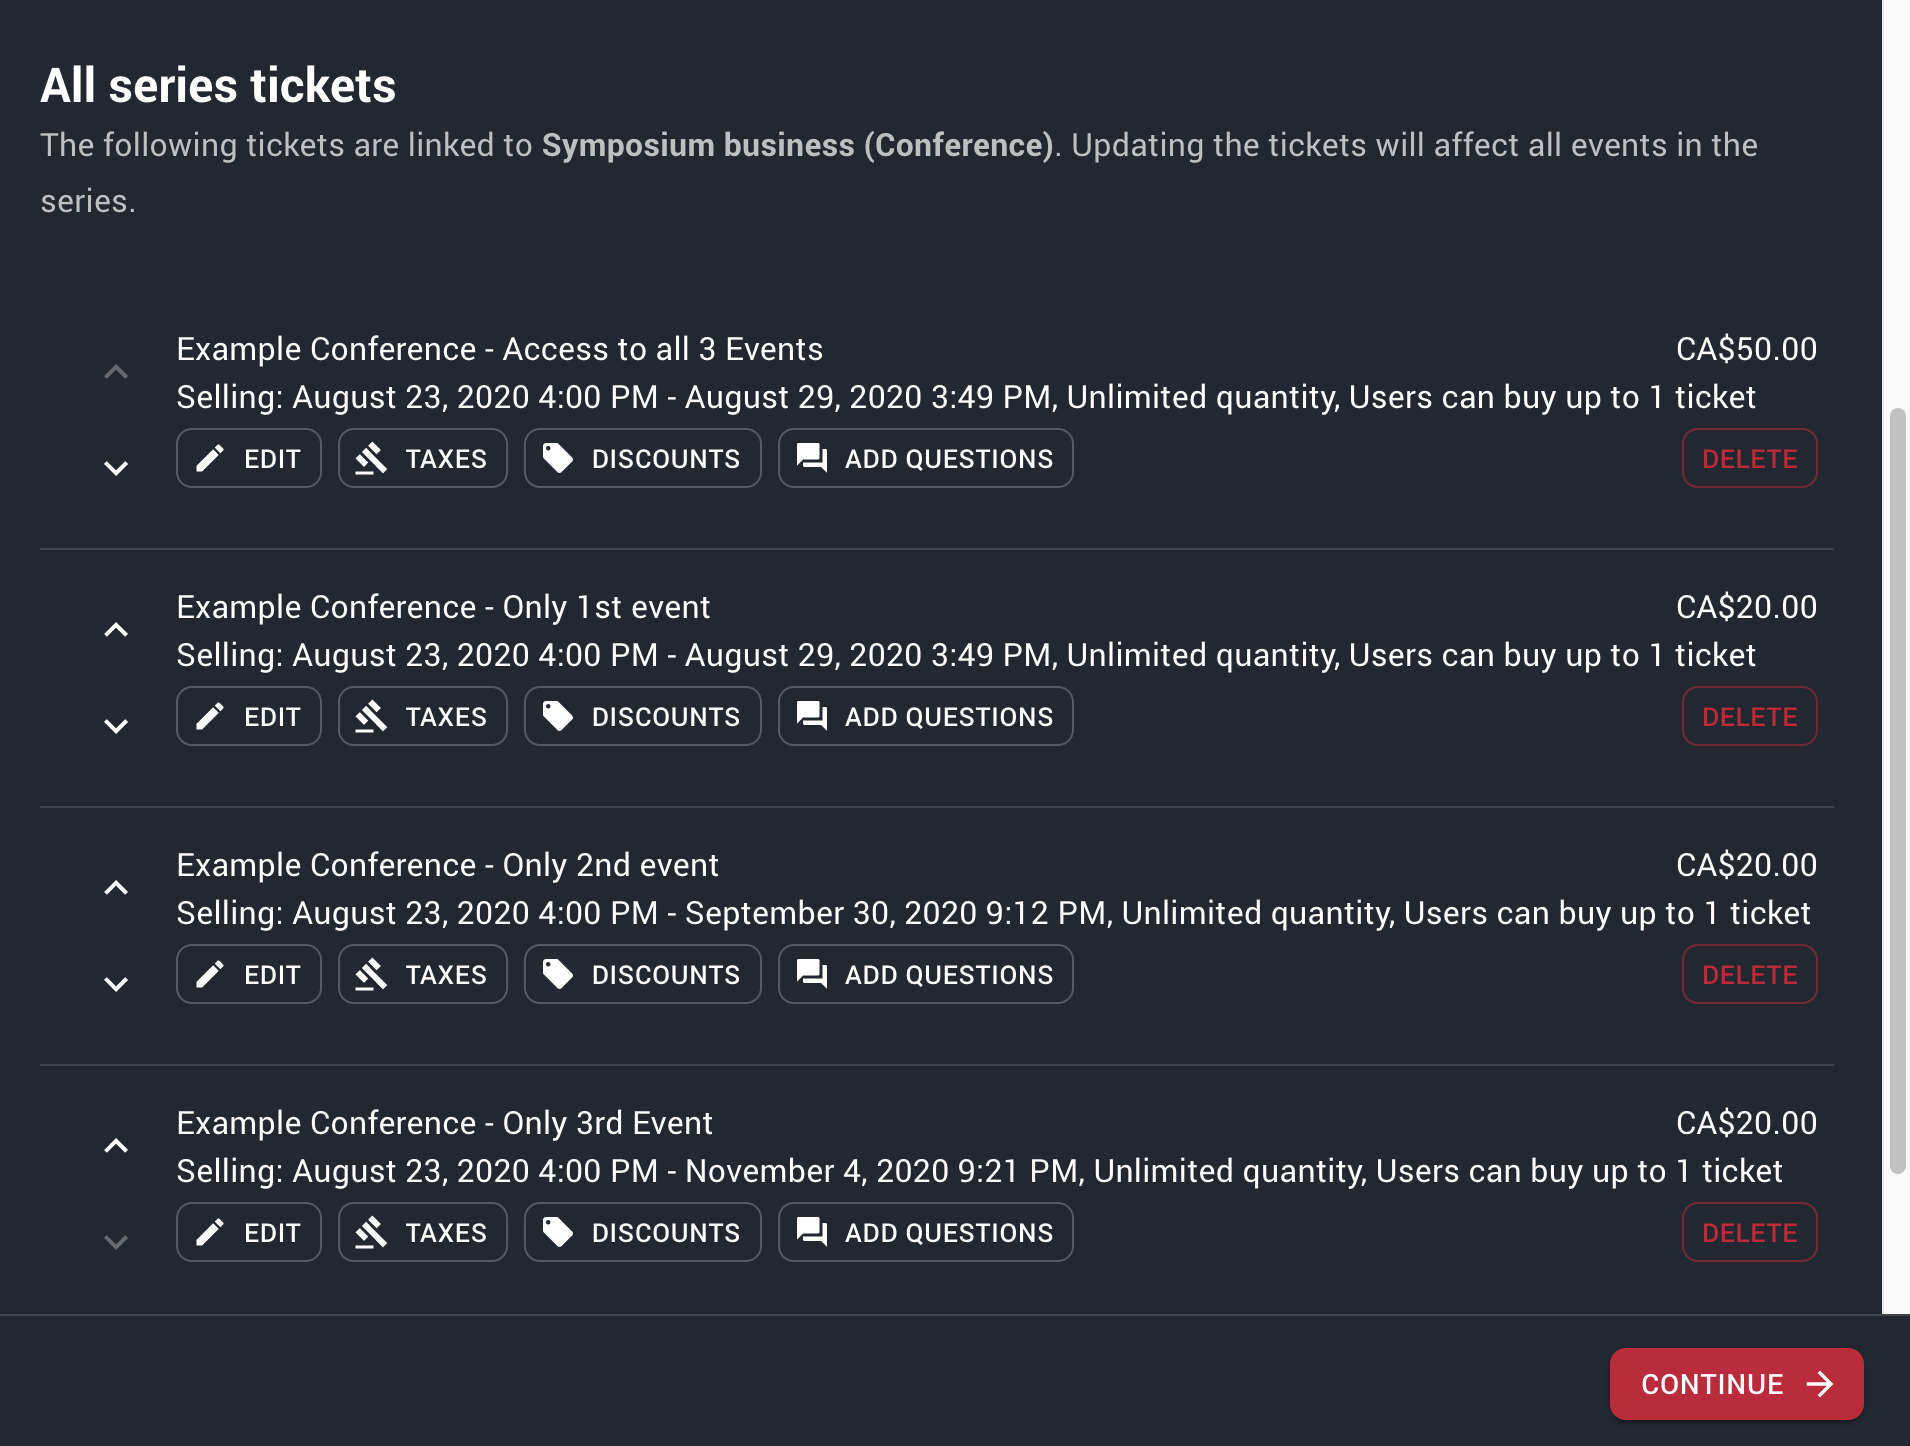
Event series ticket setup for the 3rd event
- Click CONTINUE and you can skip over the next steps again and close the wizard.
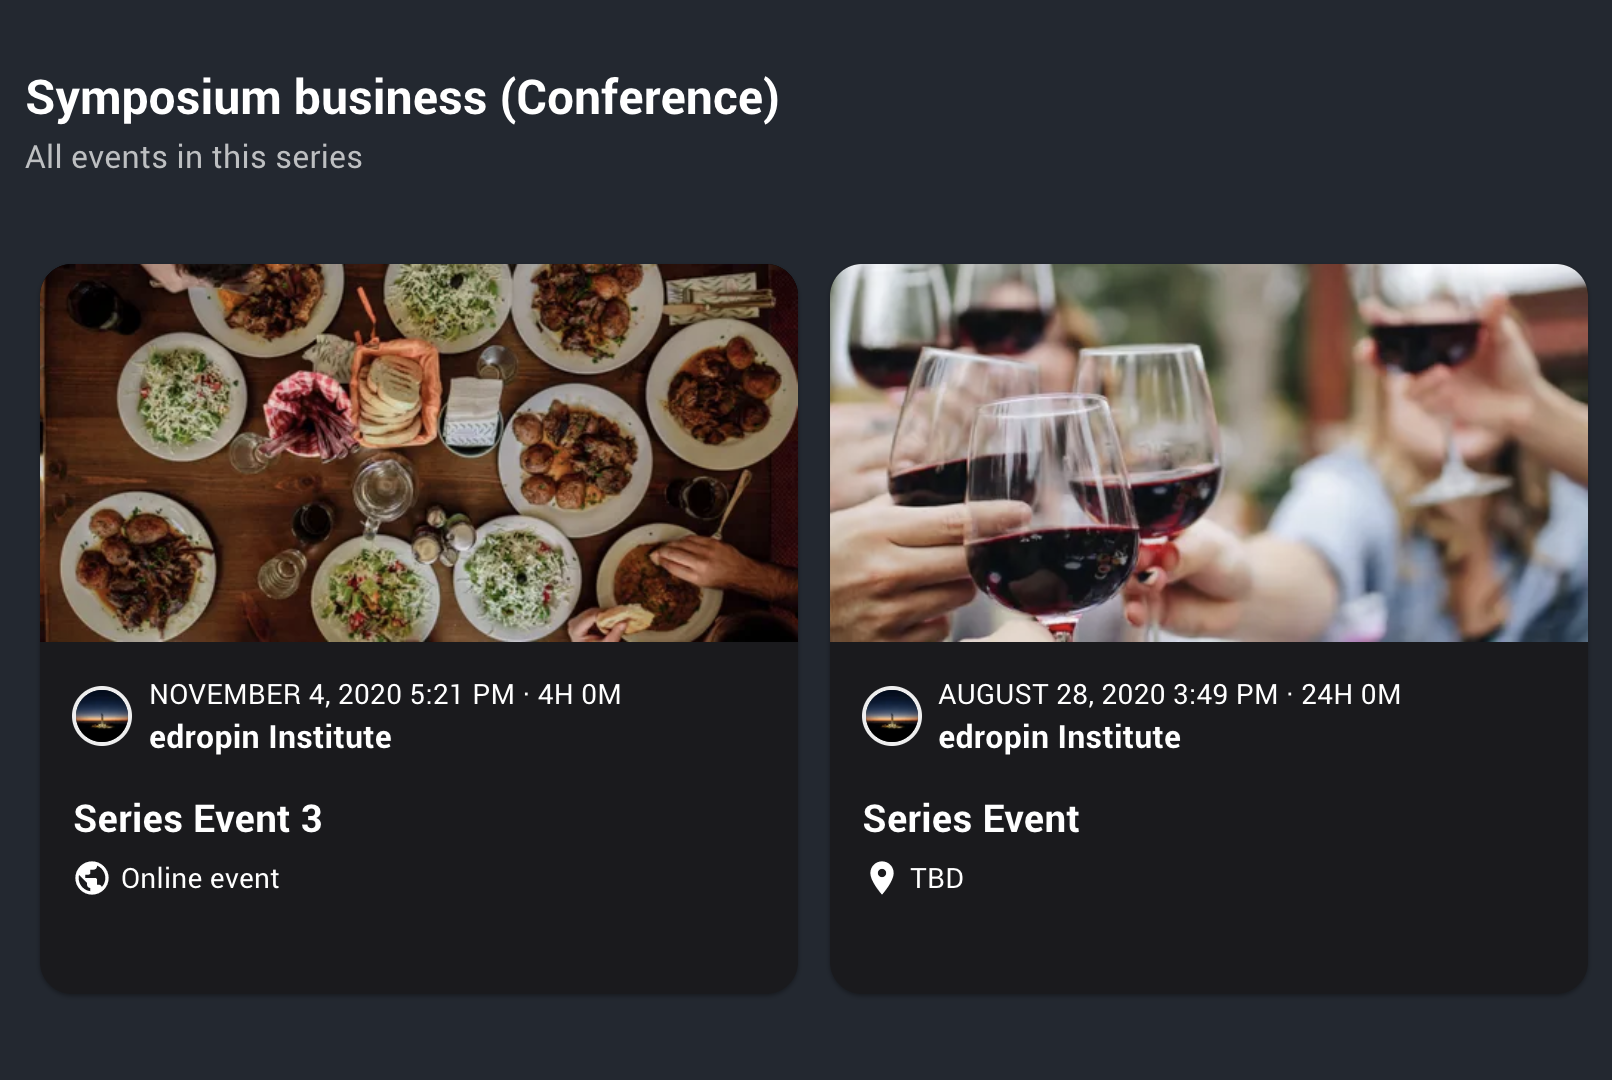
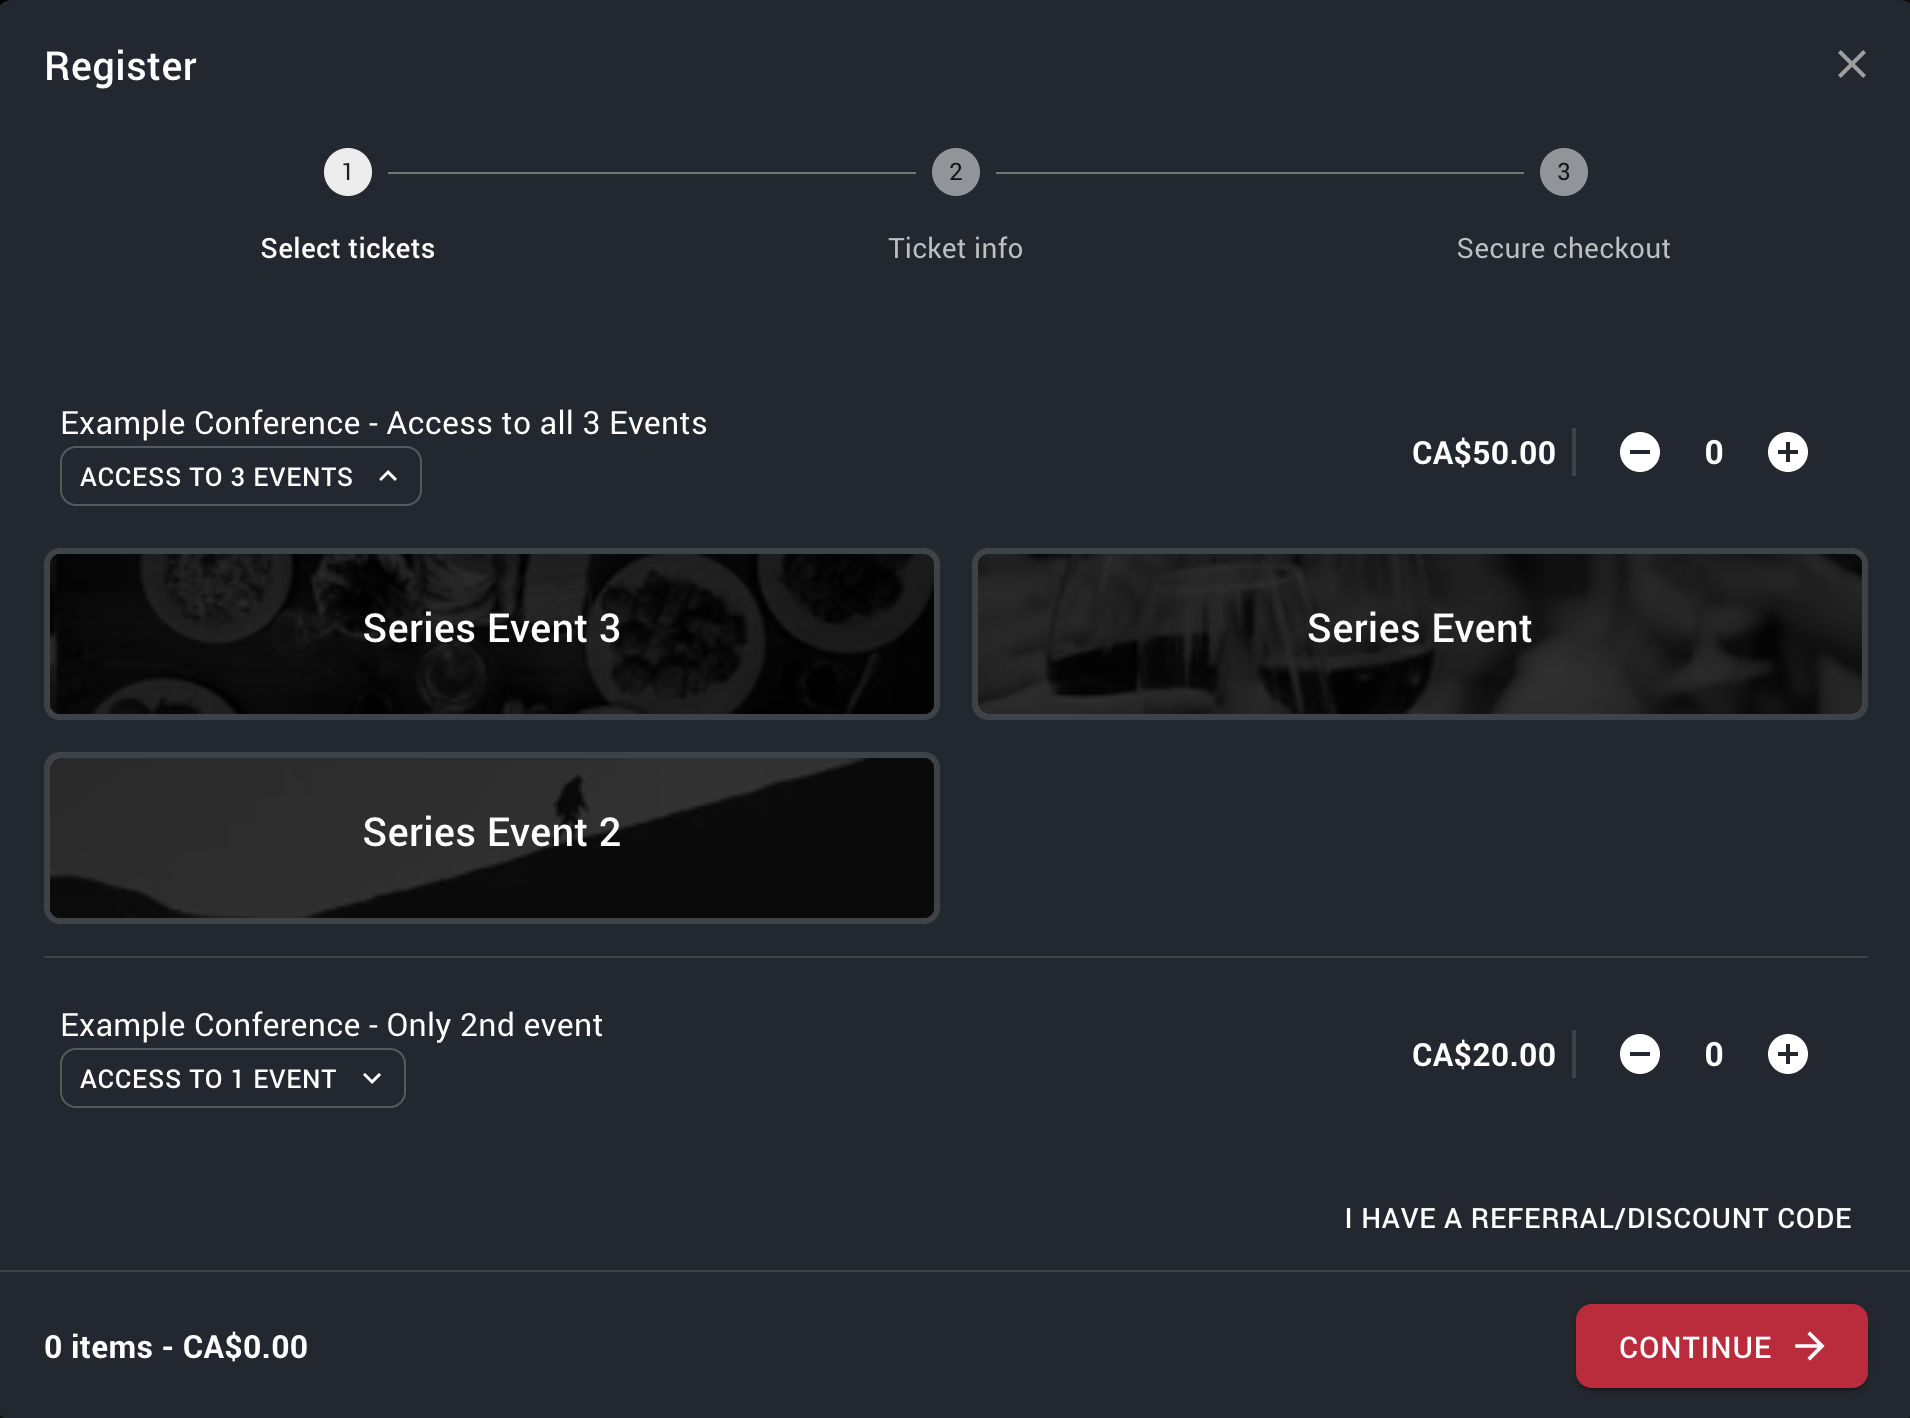
Time to view the fruits of our labor. From the Host Page, click the VIEW ICON (eye) next to one of the events linked to our conference. The first thing to note on is in the description. Because we have linked this event to a series, the rest of the events also show up in a carousel.
# Setup Sessions in Event Wizard
Sessions are the key way to track attendance and manage certification on edropin. To learn more about Sessions see What is an edropin Session.
On the third step of the Event Wizard you are asked to setup your sessions. For most simple events, you will need just 1 session for your event. If you are not using the event wizard or want to manage Sessions for an existing event, see Create a session for usage.
- On the third step of the Event Wizard, select the type of Session you would like to create:
- Zoom Meeting/Webinar: Use this type of session for meetings hosted using the Zoom platform. This will allow your guests to launch the Zoom meeting when the session starts and record their check-in time and then at the end record their check-out time.
- In-Person: Use this type of session to offer guests the ability to scan in and out at the event door using our native edropin app on iOS and Android.
- JITSI Meet: Free alternative to Zoom with no need to download anything to your computer. Great for meetings of up to 20 people (Coming soon...)
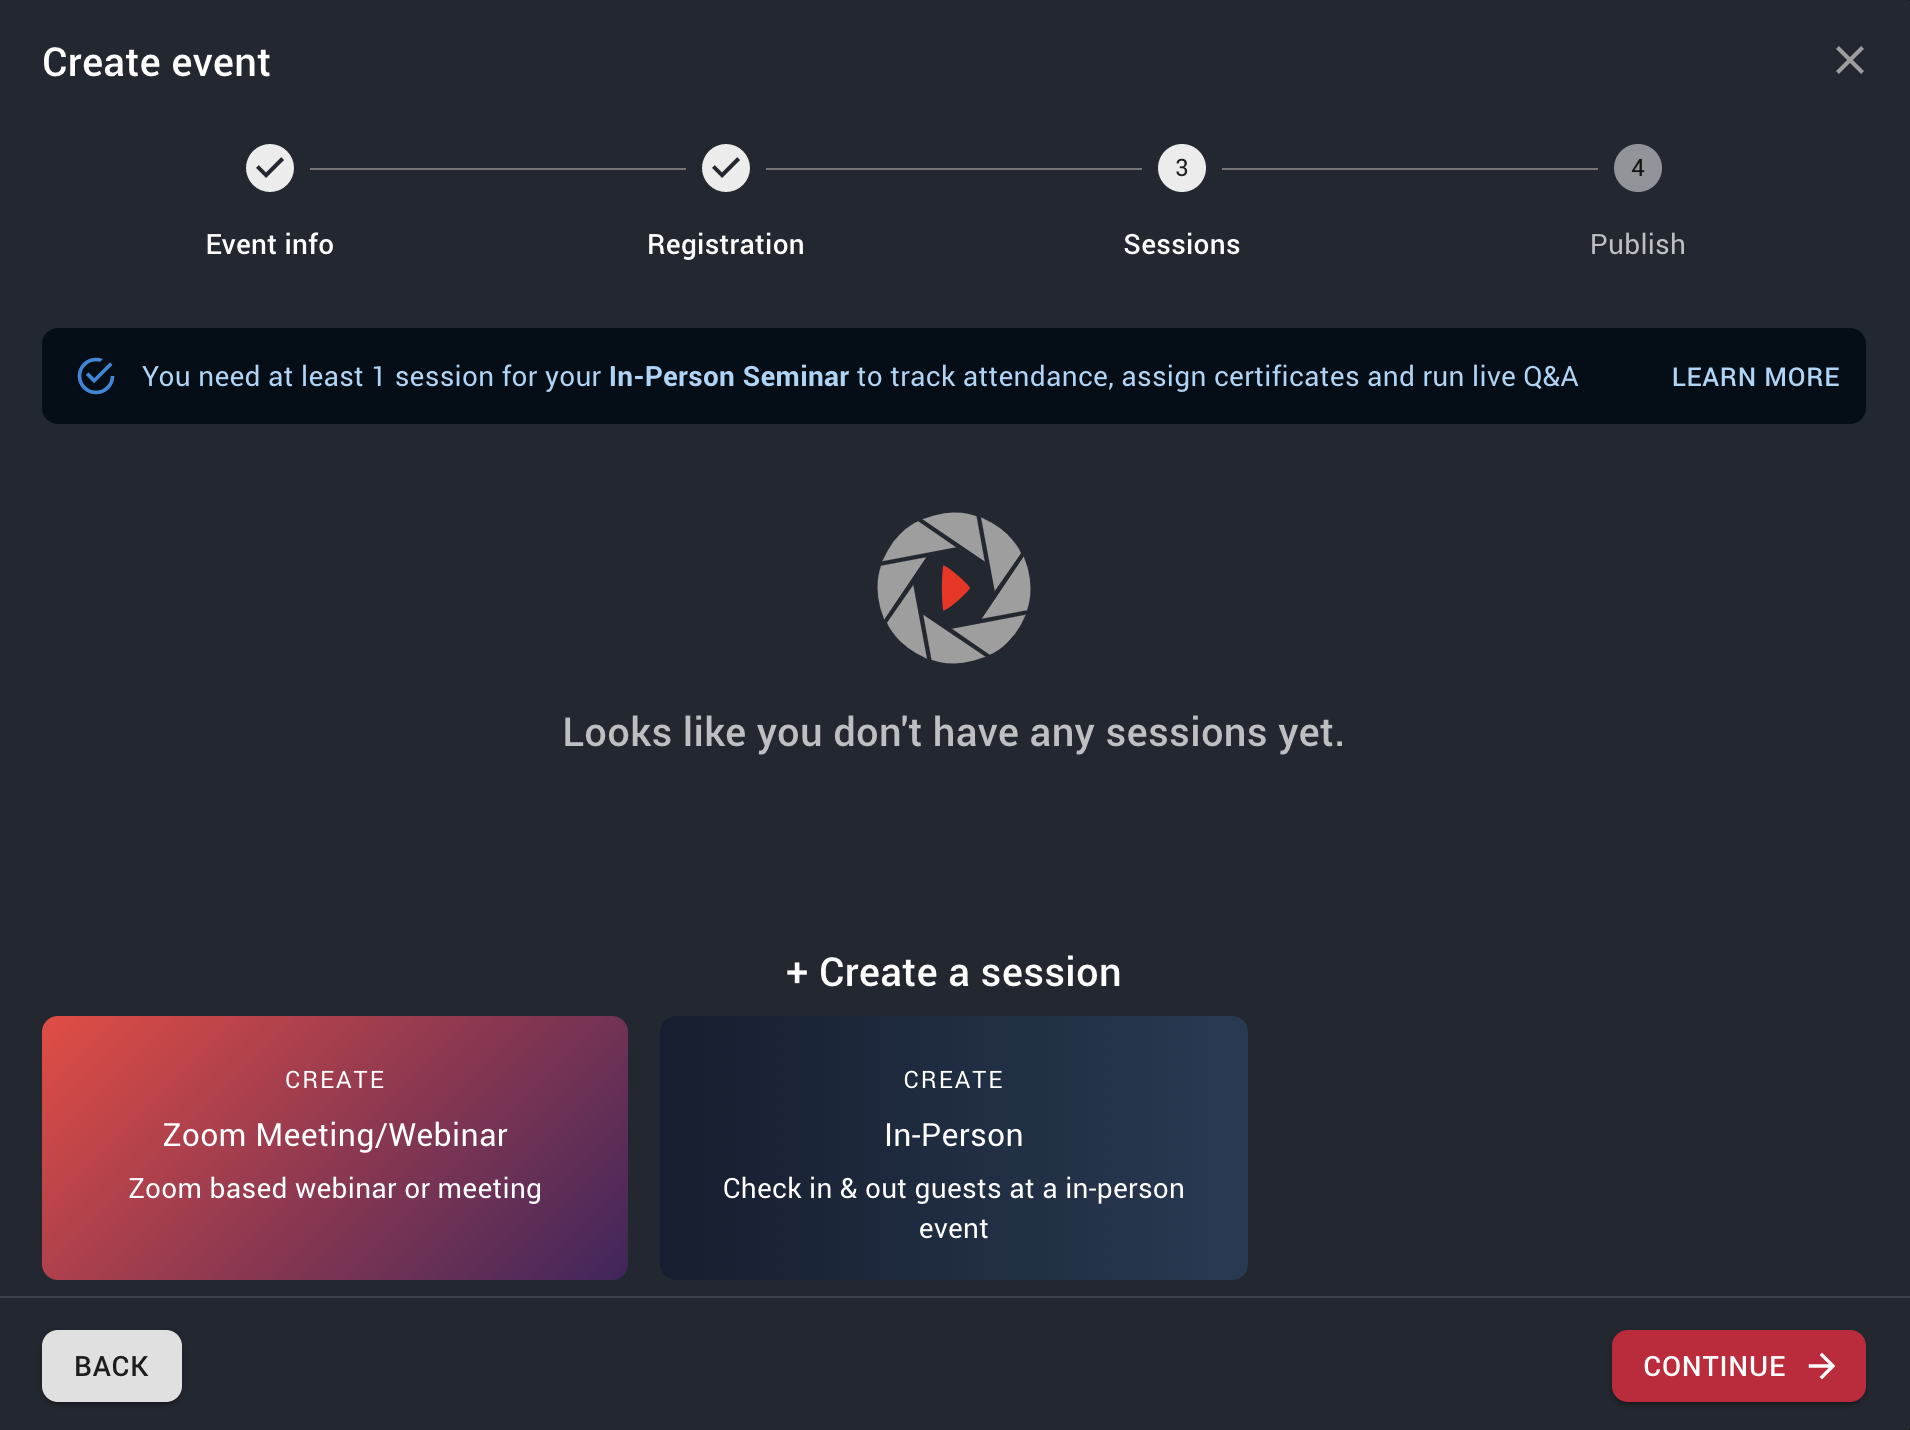
Setting up session in the event wizard
- We will setup a Zoom Meeting for our session. Click Zoom Meeting/Webinar under + Create a Session
- Fill out the session details:
- Session Name (Required): Simply the name of the session. We recommend using the event name followed by type of session e.g. Fellowship Club: Zoom Meeting
Session Description (Optional): Tell your guests a little more about this session
Who can join? (Required): This allows you to select which guests registered for the event will have access to this session
- Select All Event Attendees if you would like to give everyone access to the session
- Select Based on Ticket Type if you would like to only let certain ticket holders join this session (e.g. Only Platinum Tickets)
- Select All Event Attendees if you would like to give everyone access to the session
Start Date (Required): When does this session start. This date/time must be between the start of the event and the end of the event
End Date (Required): When does this session end. This date/time must be between the start of the event and the end of the event
Select Session Type (Required): This should be set to one of the Session Types mentioned above (Zoom, In-Person, Jitsi)
Additional Information (Required): If you select Zoom/Jitsi, you will be asked for additional information regarding Meeting Information
- Zoom Meeting:
- Zoom join link (Required) - This is where you put the url to your meeting e.g. https://us04web.zoom.us/j/...
- Meeting Password (Optional) - The password to join this meeting
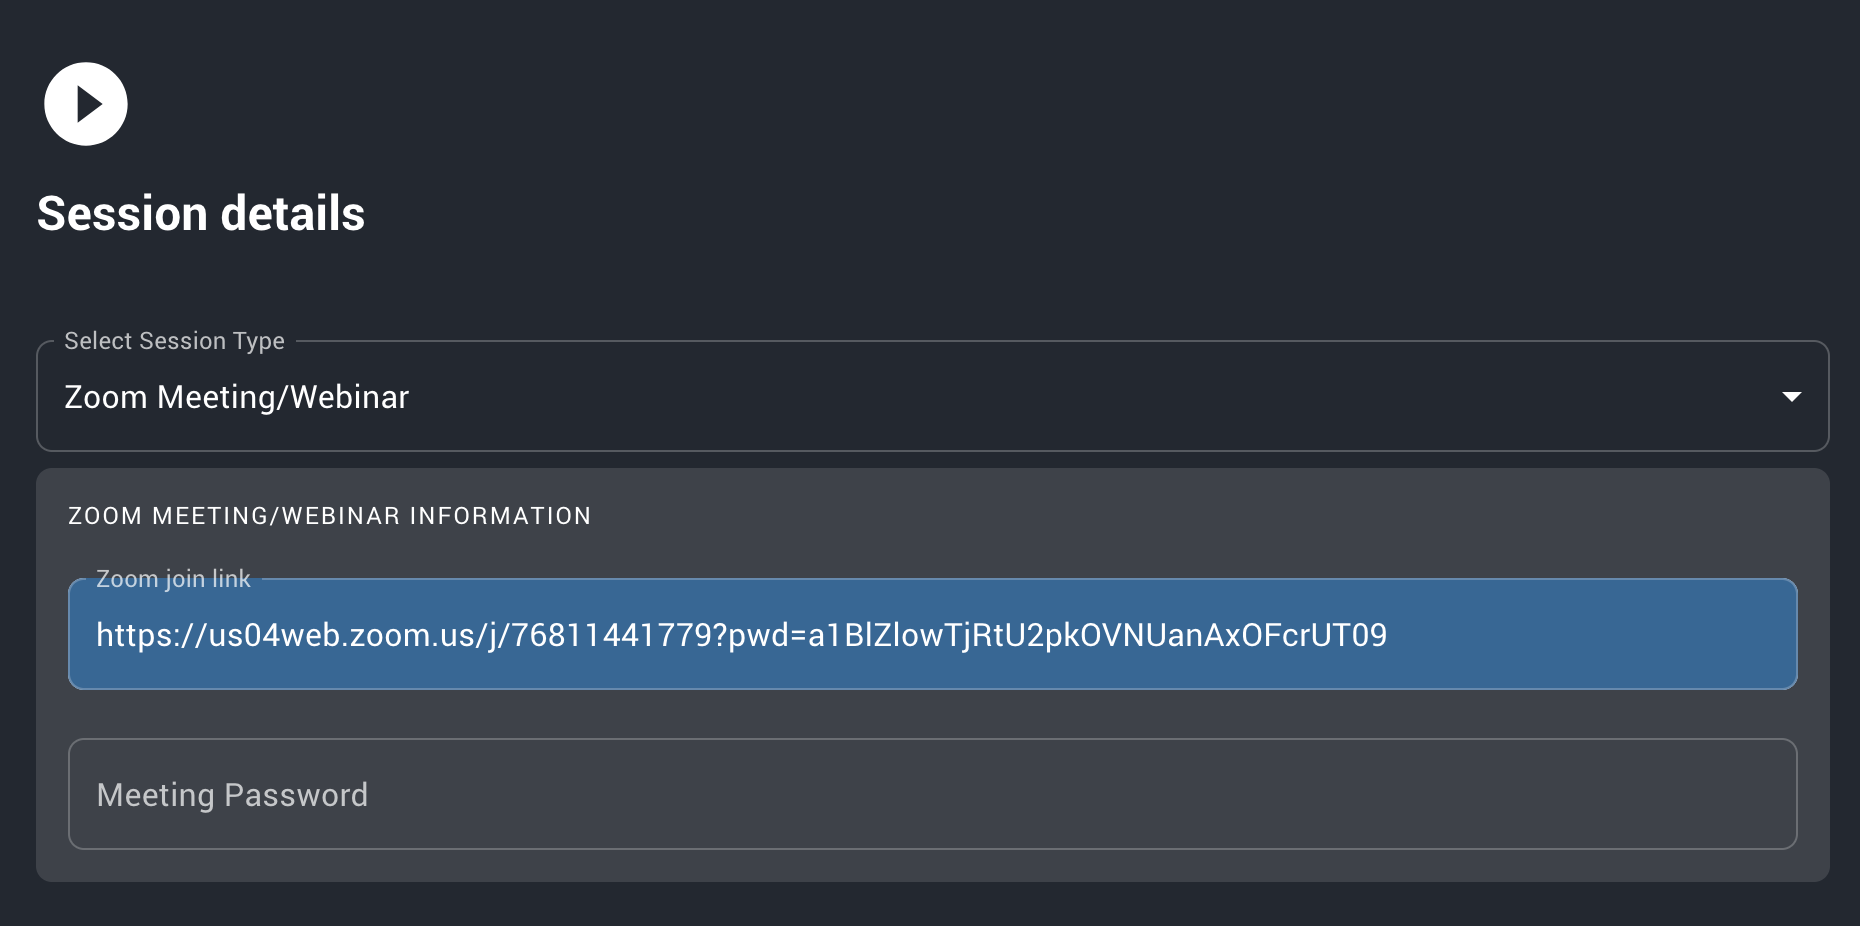
Setup session Zoom information such as meeting and password
- Zoom Meeting:
Link a Pre-Questionnaire (Optional): If you would like to survey your guests right after they start the session, before they can launch a virtual meeting you should link a pre-questionnaire. See Linking a Questionnaire for more information about questionnaires.
Link a Post-Questionnaire (Optional): If you would like to survey your guests right after they finish the session, before they receive their certificate you should link a post-questionnaire. See Linking a Questionnaire for more information about questionnaires.
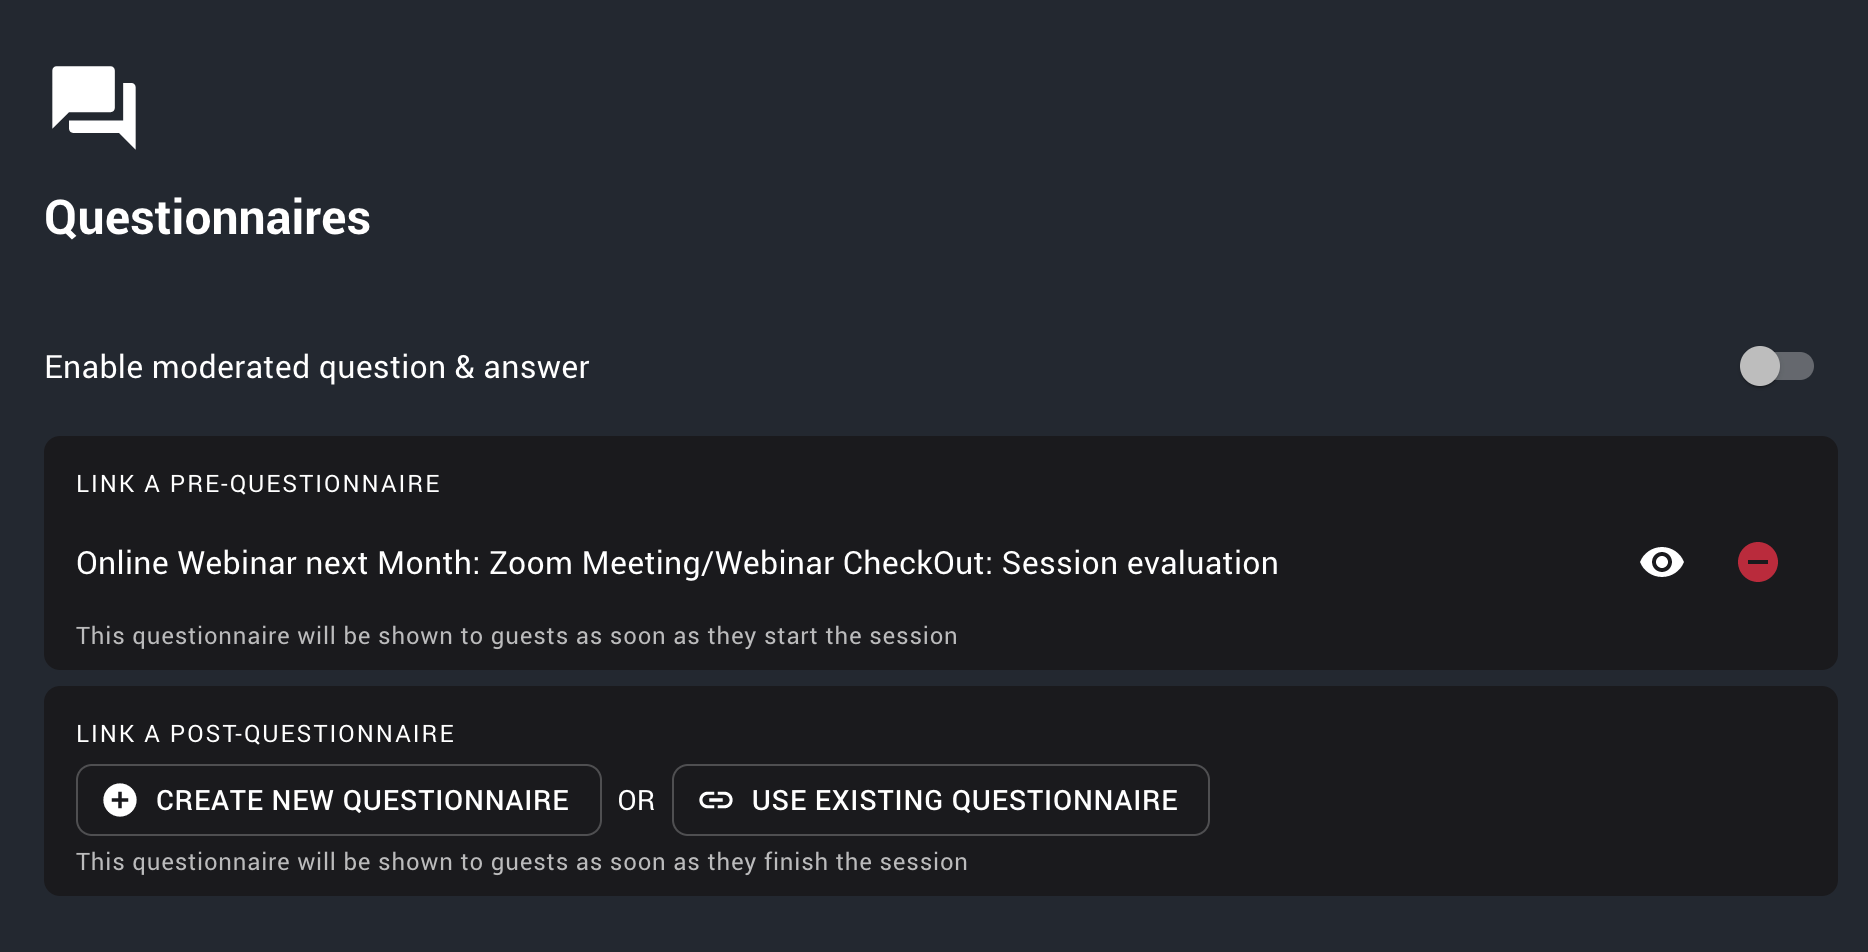
Setup session questionnaires for pre-post Credits & Certificates (Optional): If you would like your guests to earn credits for attending this session (e.g. PACE or CERP), then you can add certificates to this session. See Linking a Certificate for more information about certificates.
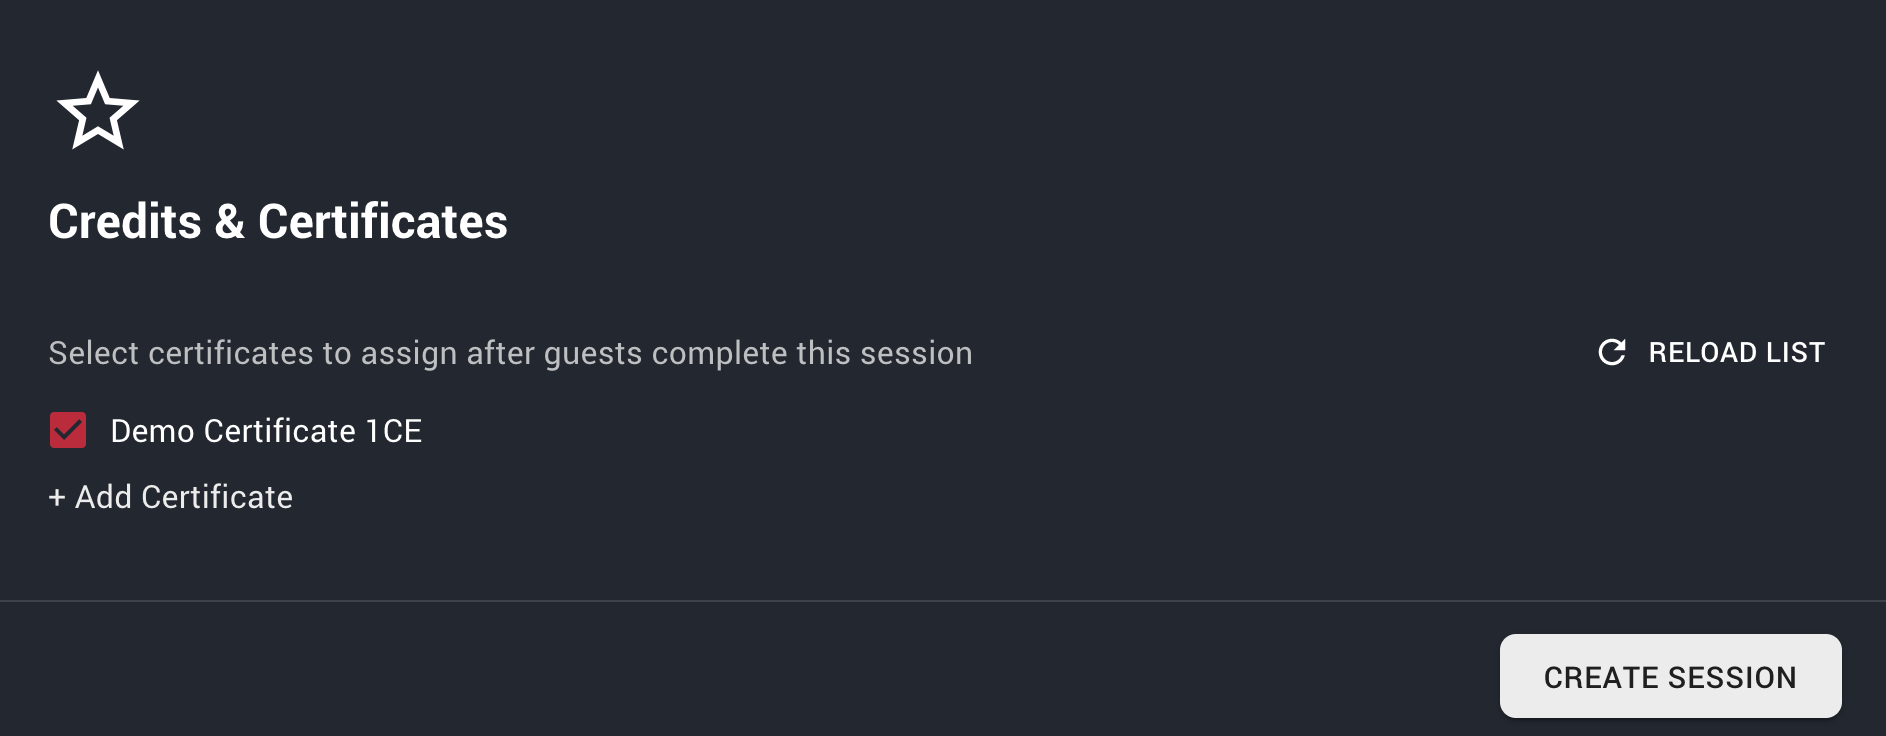
1 Certificate enabled for session
- Click "CREATE SESSION"
- If your session is not created, make sure you check any fields marked in red.
# Publishing in the Event Wizard
Awesome, on the last step of the Event Wizard. This controls who can access your event.
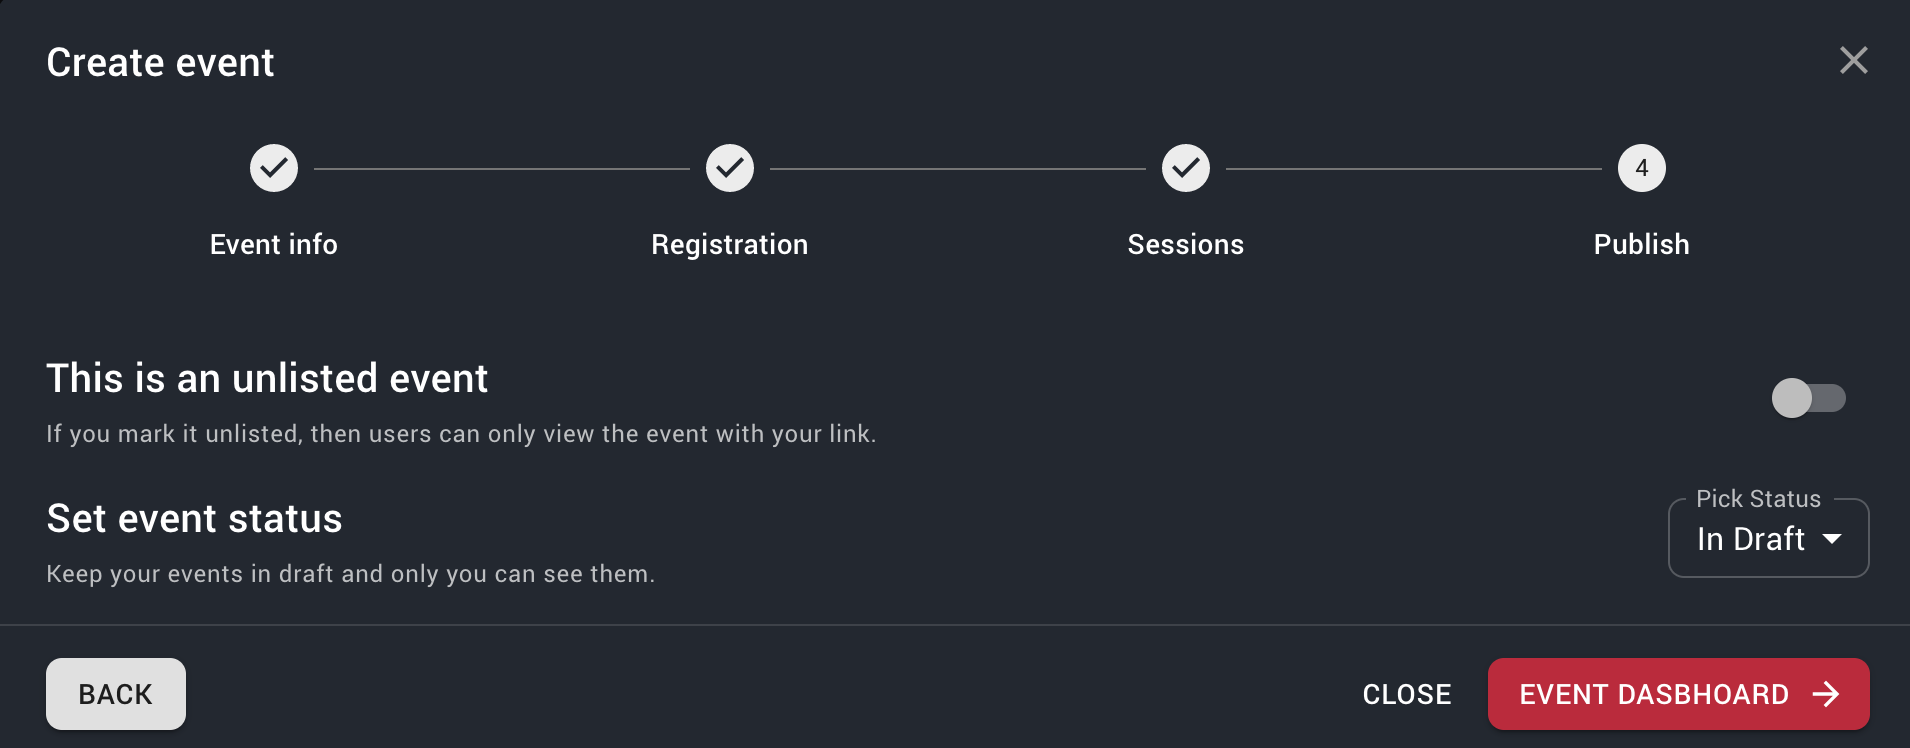
The most important setting on this page is your Event Status. You can choose between "In Draft" and "Live". * In Draft: Use this to keep editing your event. Only you will be able to preview this event. Anyone else who visits your event page will be shown a "Not Found" Error. Ticket sales will not work in this status. * Live: Use this to publish your event so other guests can register and view the details. Ticket sales are enabled when the event is Live
When done with the publish setting, you can click Event Dashboard.
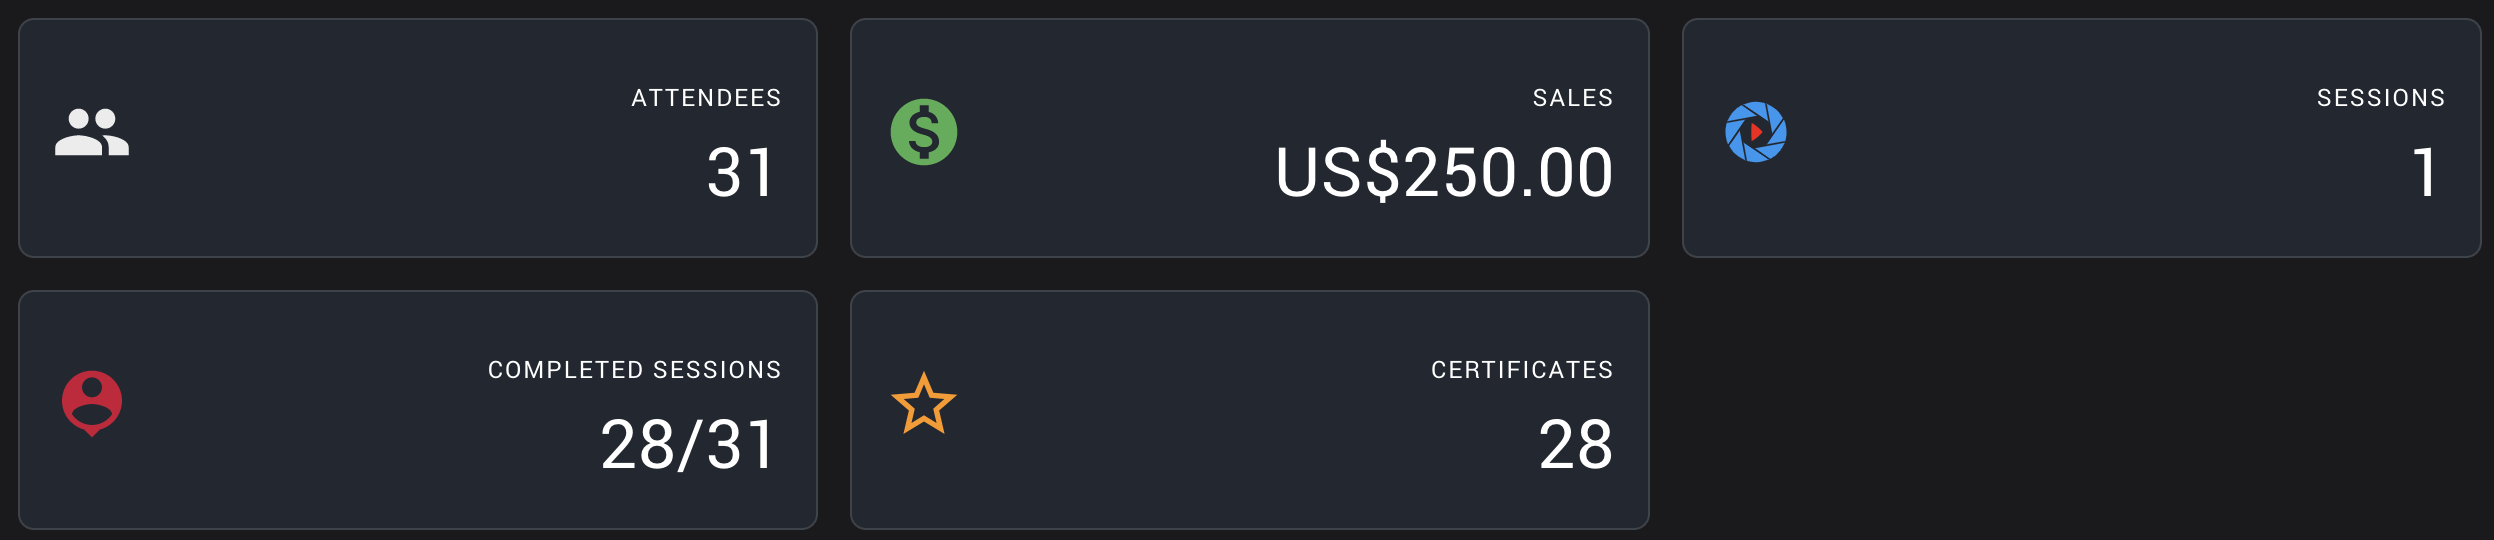
# Event Dashboard
You can event dashboard go to the Host Page and select an event from the list. Don't see any events? Create an event
# Update an event
To modify an event, visit the Host Page and click the Edit (Pencil) Button in the listing.

On the listing event page you can update and modify all of the details for the event:
- Select the type of event
- Webinar: This event is used for connecting guests online e.g. using a Zoom meeting. Great for online courses and meetings.
- In-Person Seminar: Traditional events that are held at a real-world location.
- Series/Conference: Choose this option to group several events together. These events can be either virtual or in-person and they are usually connected in context. e.g. a lecture series or a national conference. See Creating a Series/Conference for more details.
3 Event types to select from when creating a new event
- Event Picture (Optional): It is highly recommended that you upload an event picture to feature your event. Guests tend to be more interested in registering when there is a nice photo. We recommend an image aspect ratio of 2:1 (1920px x 1080px). You can use a tool like PIXLR online to help you create a nice event image.
- Event name (Required): Simply the event name (Limited to 200 characters)
- Community (Required): Pick the right community (e.g. Dental, Dental Hygiene). This will help us target the right audience for your event on the Explore page.
- Select a Series/Conference: This option will only show up if you are creating a Series/Conference event.
- Select either an existing series/conference to link this event or create a new series/conference if this is the first event you are creating in the series.
- Is this event in-person?: This option will only show up if you are create a Series/Conference event.
- You can create virtual or in-person events within one series/conference
- Start date (Required): Select the start date/time for this event
- End date (Required): Select the end date/time for this event
- Timezone (Required): edropin will use your current timezone by default, you can change this if your in-person event takes place in a different timezone.
- Short Description (Optional): Tell your guests a little more about this event (Limited to 15,000 characters)
- Event Location(Optional): This will only show up if you are creating a In-Person Serminar or if you toggle "Is this event in-person?" for a Series/Conference type of event.
- Use the Google Autocomplete feature, to quickly add a location to your event.
- About the Event (Optional): This is a full featured text editor that will let you add formatted text for your events. You can add formatting such as bold, underline, italics, large and small text, quotes, bulleted and numbered lists.

Slate showing the format friendly text editor for events
# Adding sessions to an event
See Create a session for details on how to add new sessions in an event.
# Adding tickets to an event
See Create a ticket for details on how to add new tickets in an event.
# Adding certificates to an even
See Create a certificate for details on how to add new certificates in an event.
# Manage event publish settings
Open an event from the Host Page. Go to Sidebar > Host > Publish
The most important setting on this page is your Event Status. You can choose between "In Draft" and "Live". * In Draft: Use this to keep editing your event. Only you will be able to preview this event. Anyone else who visits your event page will be shown a "Not Found" Error. Ticket sales will not work in this status. * Live: Use this to publish your event so other guests can register and view the details. Ticket sales are enabled when the event is Live
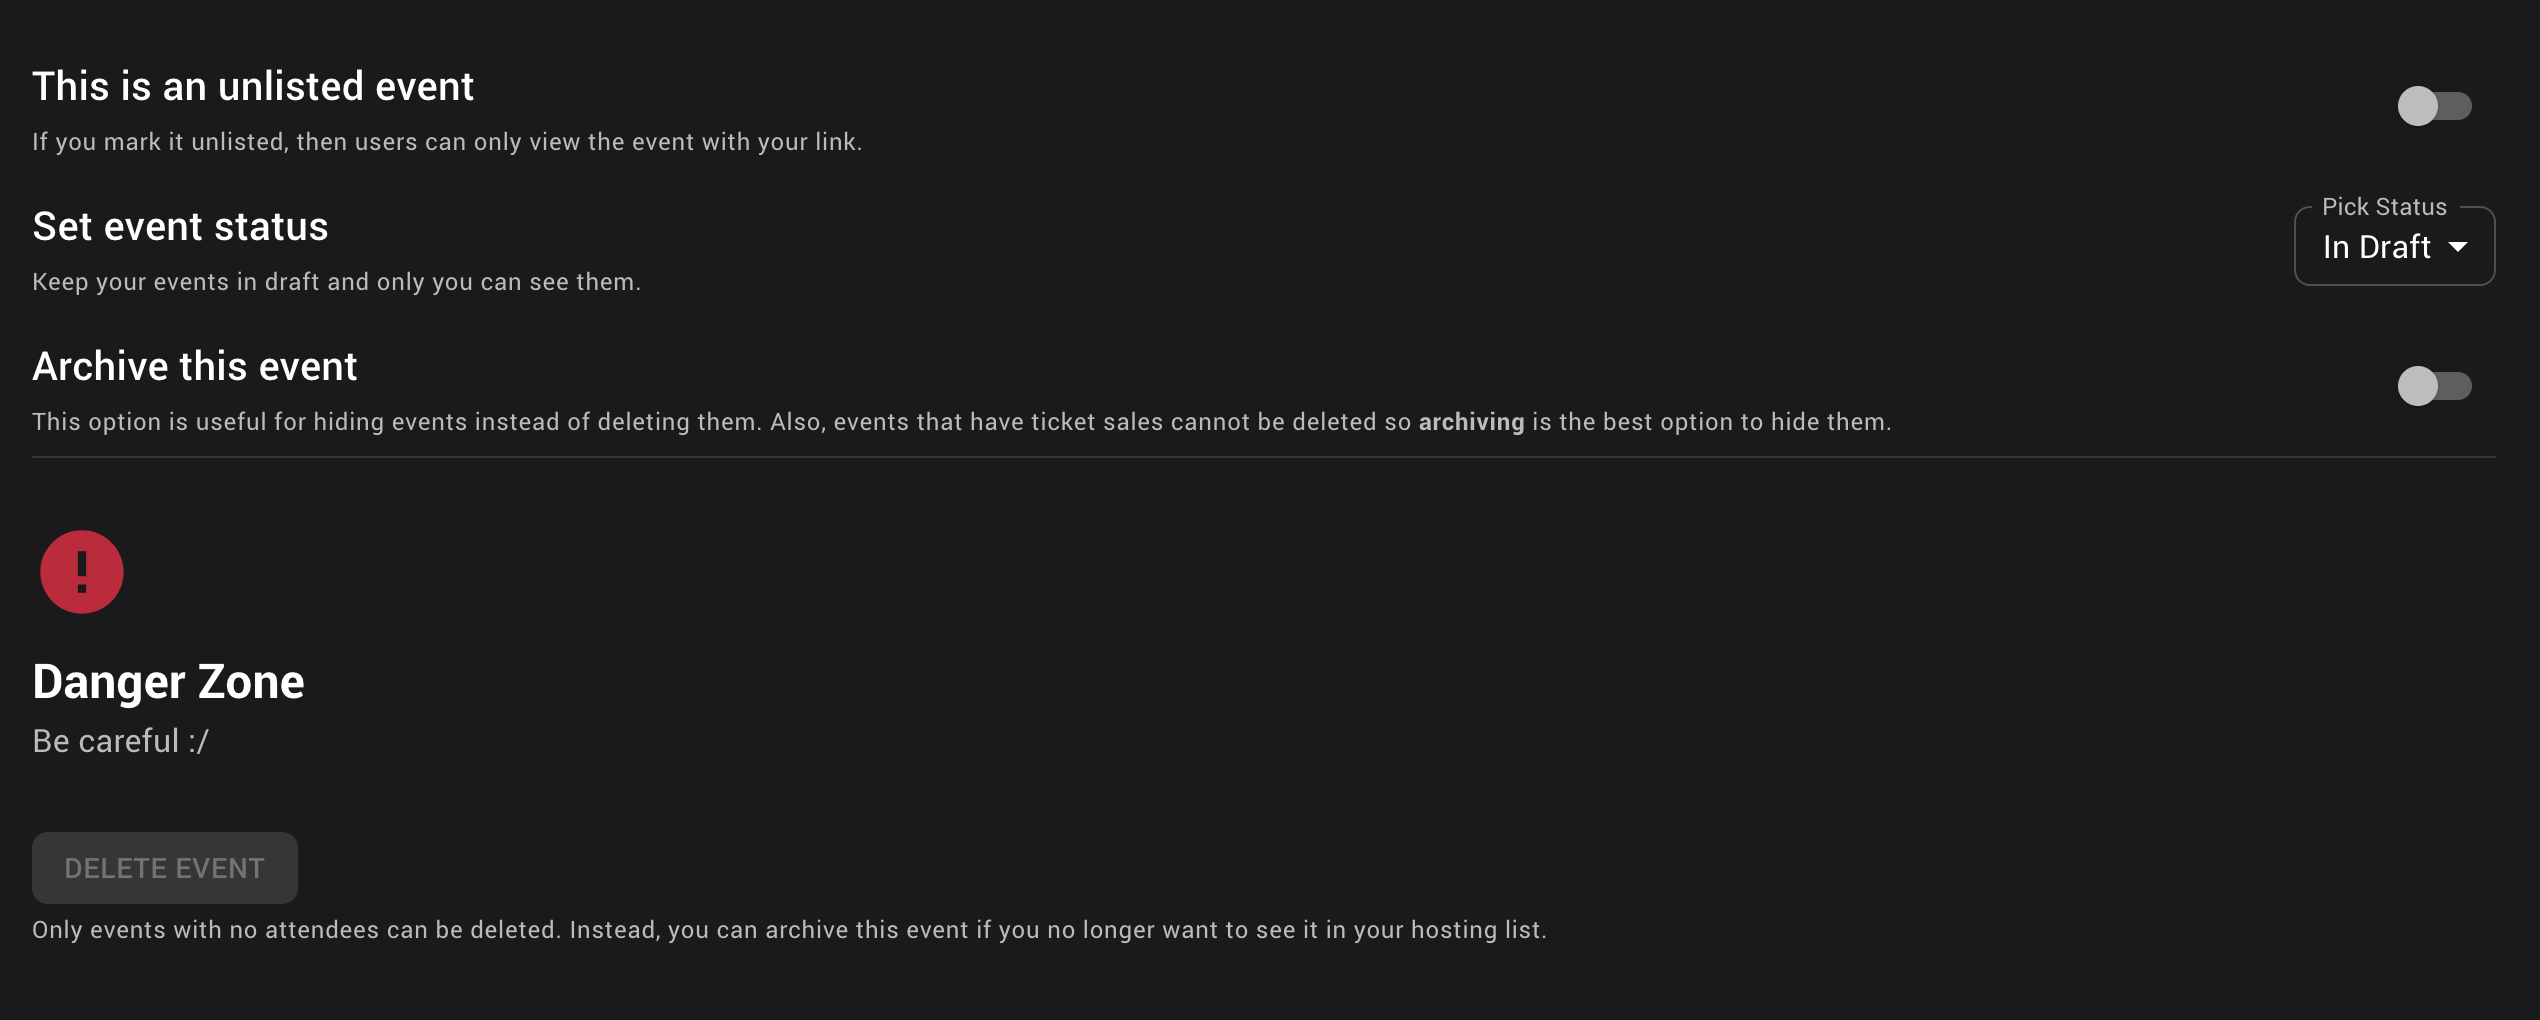
# Delete an event
Open an event from the Host Page. Go to Sidebar > Host > Publish
If you have no Event Attendees, you can delete the event from the Event Publish page.

If you have attendees in an event, you have one of two options. The first option is to just Archive the Event. This will hide this event from your host page and stop all sales. It won't be deleted and users who already own a ticket to this event will still be able to see it. To archive the event, simply go the Event Publish page and toggle ON "Archive this event"
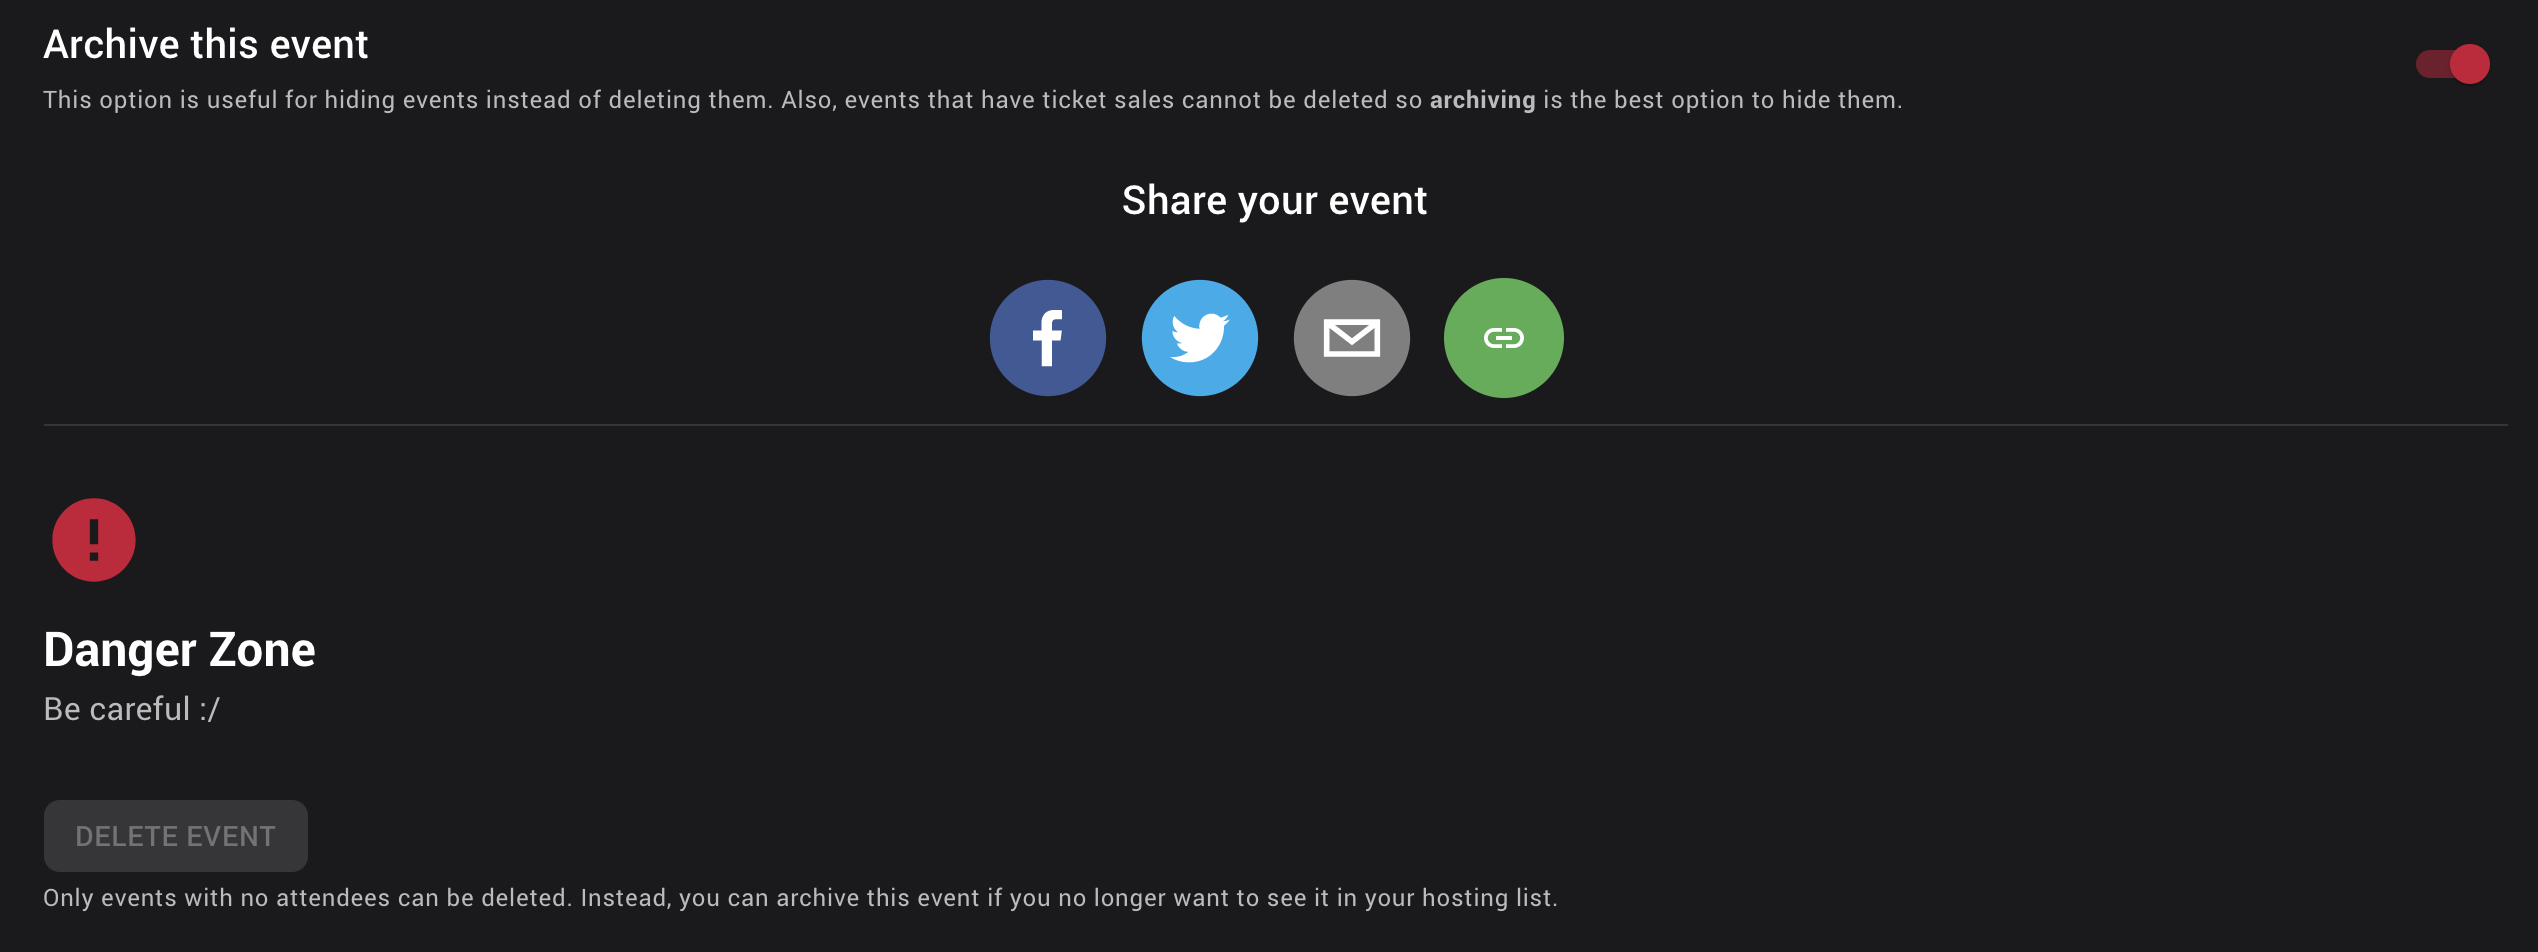
If you want to delete an event with Event Attendees, then you will have to Remove all tickets with sales from the event. See Remove ticket from event. After all tickets with sales are removed, you will be able to delete the event.
# Remove Ticket from Event
Open an event from the Host Page. Go to Sidebar > Host > Tickets
On the Event Ticket Dashboard, click "EDIT TICKETS". Simply click "REMOVE FROM EVENT" next to the ticket you would like to remove from the event and confirm.

# Add ticket to Event
Open an event from the Host Page. Go to Sidebar > Host > Tickets
Want to add an existing ticket to your event? See Add existing ticket to Event
On the Event Ticket Dashboard, click "+ Create New". See Create a Ticket to fill in the details
# Add existing ticket to Event
Open an event from the Host Page. Go to Sidebar > Host > Tickets
On the Event Ticket Dashboard, click "EDIT TICKETS". Click "ADD EXISTING TICKET" See Create a Ticket to fill in the details
# Tickets
# What is a ticket?
On edropin tickets are completely independent entity which means that it exists outside the scope of an event. This allows you to create 1 ticket and link it to multiple events. See Add existing ticket to Event for details.
# Create a ticket
- Fill in the details for your new ticket:
- Ticket Name (Required): Give your ticket a name that is easy to relate to your event. e.g. (Event Name - General admission). This is important because on guest invoice, your ticket name will be shown without the event and if you give a generic name like "General admission" the user may not know which event this ticket is related with.
- Ticket Price (Required): Set the price for your ticket. If you want to offer a free ticket then set the price to 0. Price can not be less than 0.
* Transaction fees: As edropin uses Stripe for all monetary transaction to securely and quickly deposit all money directly into your account, any charges will incur merchant fees set by Stripe. Please see Stripe Pricing for details.
- edropin fees Any ticket sold on edropin that is more than $25.00 will incur a $1.00 edropin service fee in addition to any an all Transaction Fees.
- All fees are deducted from the hosts payout and not added on top of the price. If you would like to pass these costs to your guests, then increase the ticket price to reflect the fees.
- Limit the total number of tickets (Optional): This switch allows you to control number of registrations for this ticket. If this switch is "off", total number of sales will not be limited. * When you turn this "on", you will have the ability to set the maximum number of tickets (must be greater than or equal to 0)
- Limit number of tickets per user (Optional): See note before turning this off This switch allows you to control the number of tickets each person can register under their account. If this switch is "off", a user can register for as many tickets as they like (limited by Total number of Tickets available).
- When you turn this "on", you can specify the total number of tickets each user can register.
- This setting is great in limiting guests from accidentally buying multiple tickets to your course or seminar.
- Is this ticket on-sale for a limited time? (Required): You can toggle this switch on/off to if you want to set a sale end time and a sale start time. Most events will have this switch set to "on"
- When you set this switch "on", you will have to specify a start sale date/time and an end sale date/time. Tickets will only be available for sale between the specified times.
- Short description (Optional): This is a great place to tell your guests more about what they are registering for. You can also use this space to include additional notes about extras and things that are included or not-included
- Click "CREATE TICKET"
- If your event is not created, make sure you check any fields marked in red.
This is to ensure that each professional keeps their CE Certificate and linked membership on their own account to avoid confusion and mis-assigning credits.
# Update a ticket
# Adding discounts
# Adding taxes
# Asking pre-sale questions
# Managing sales
# Refunding
# Selling a ticket over the phone
# Delete a ticket
# Sessions
# What is an edropin session?
Sessions are the key way to track attendance and manage certification on edropin.
Session can only be created within an event and can not be shared between events. The best way to think of sessions is for managing a guest's journey through your event. Simple events such as a webinar may only have 1 session that let's user join an online Zoom meeting, track their attendance and earn a certificate at the end of the event.
A complex event may have multiple sessions which only let's user access the session based on their ticket. For instance, if a user buys a General ticket they may get access to the course but only the Platinum Ticket holders get access to the Social Event after. This can be easily achieved by creating two sessions in the same event. For the course set the "Who can Join" to all event attendees. For the Social session set the "Who Can Join" to "Based on Ticket Type" and then choose only the Platinum Ticket. This is a great way to manage guests joining the different in-person or virtual sessions.
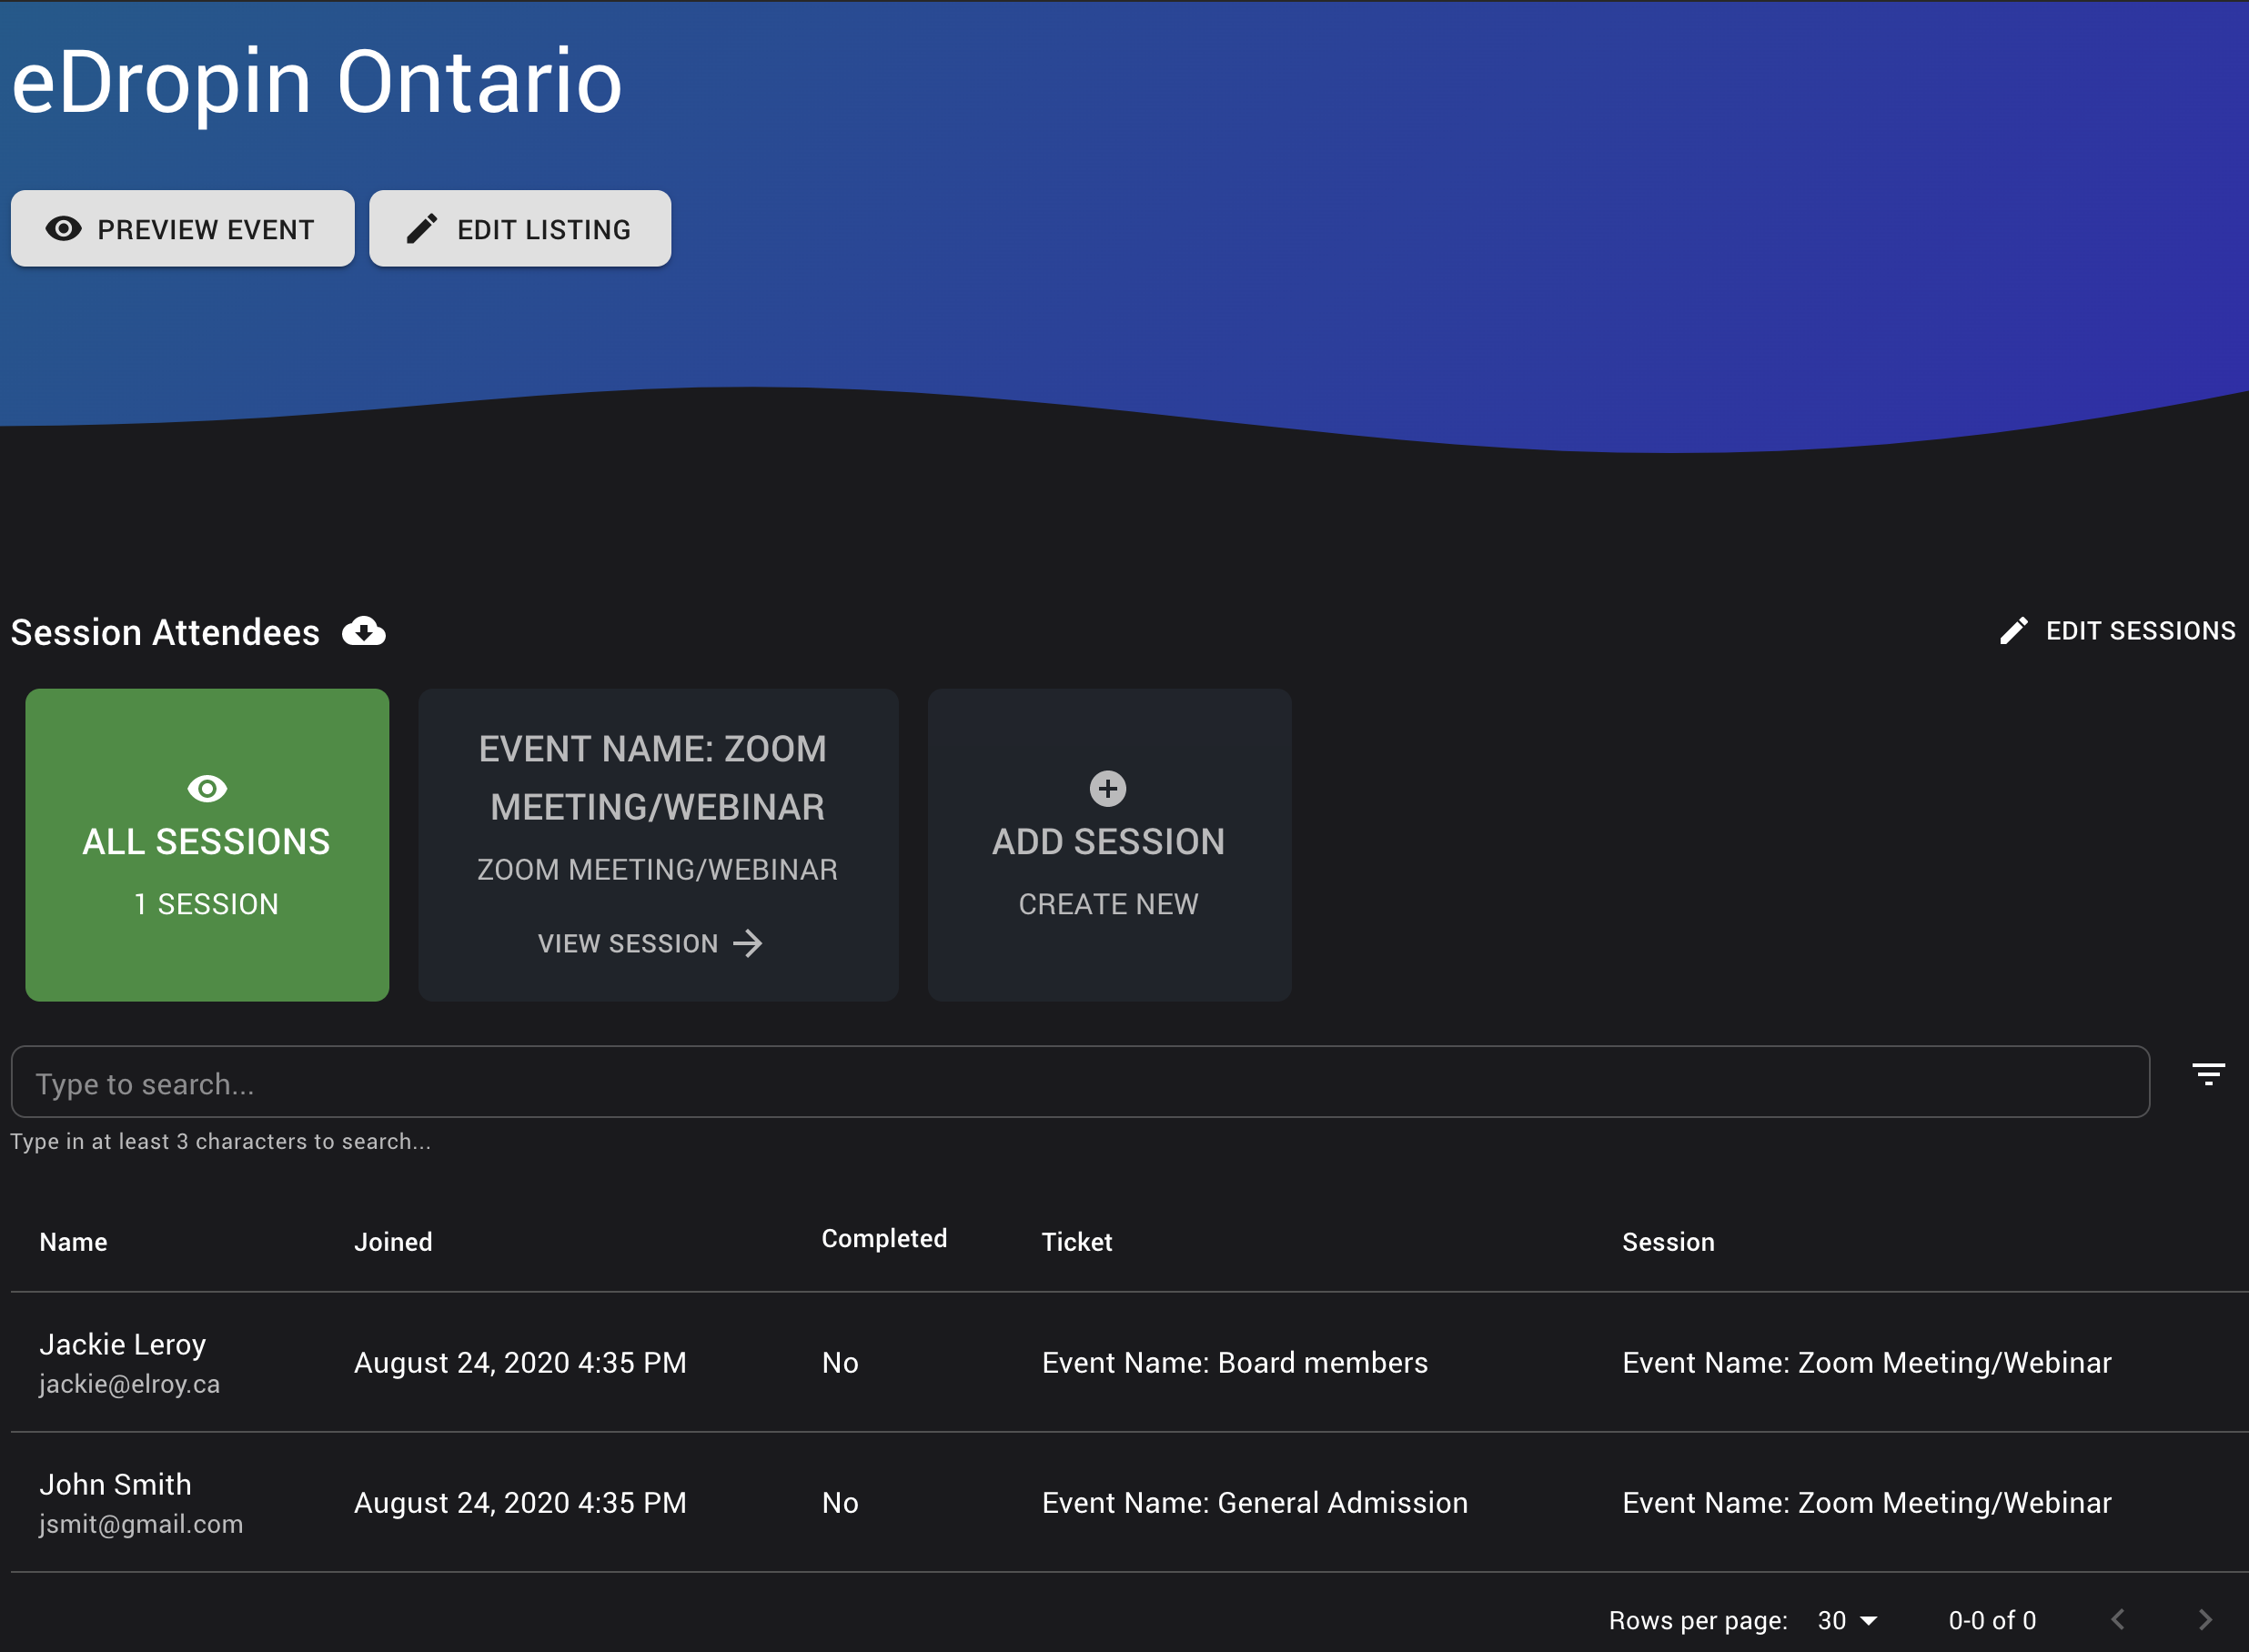
# Session Dashboard
The session dashboard shows you quickly all the attendees that are scheduled for a session in your event. It is an easy place to see how many guests have completed a session and which ones did not attend. You can also create new sessions for an event from the Session Dashboard.
To get to the session dashboard, simply pick an event from the Host Page. Inside the event, you can either click the Sessions Widget from the Dashboard or from the Sidebar > eSessions
# Create a session
From the Session Dashboard (Event Dashboard > Sessions) click "+ Create New".
- Select the type of Session you would like to create:
- Zoom Meeting/Webinar: Use this type of session for meetings hosted using the Zoom platform. This will allow your guests to launch the Zoom meeting when the session starts and record their check-in time and then at the end record their check-out time.
- In-Person: Use this type of session to offer guests the ability to scan in and out at the event door using our native edropin app on iOS and Android.
- JITSI Meet: Free alternative to Zoom with no need to download anything to your computer. Great for meetings of up to 20 people (Coming soon...)
Setting up session in the event wizard
- We will setup a Zoom Meeting for our session. Click Zoom Meeting/Webinar under + Create a Session
- Fill out the session details:
- Session Name (Required): Simply the name of the session. We recommend using the event name followed by type of session e.g. Fellowship Club: Zoom Meeting
Session Description (Optional): Tell your guests a little more about this session
Who can join? (Required): This allows you to select which guests registered for the event will have access to this session
- Select All Event Attendees if you would like to give everyone access to the session
- Select Based on Ticket Type if you would like to only let certain ticket holders join this session (e.g. Only Platinum Tickets)
- Select All Event Attendees if you would like to give everyone access to the session
Start Date (Required): When does this session start. This date/time must be between the start of the event and the end of the event
End Date (Required): When does this session end. This date/time must be between the start of the event and the end of the event
Select Session Type (Required): This should be set to one of the Session Types mentioned above (Zoom, In-Person, Jitsi)
Additional Information (Required): If you select Zoom/Jitsi, you will be asked for additional information regarding Meeting Information
- Zoom Meeting:
- Zoom join link (Required) - This is where you put the url to your meeting e.g. https://us04web.zoom.us/j/...
- Meeting Password (Optional) - The password to join this meeting
Setup session Zoom information such as meeting and password
- Zoom Meeting:
Link a Pre-Questionnaire (Optional): If you would like to survey your guests right after they start the session, before they can launch a virtual meeting you should link a pre-questionnaire. See Linking a Questionnaire for more information about questionnaires.
Link a Post-Questionnaire (Optional): If you would like to survey your guests right after they finish the session, before they receive their certificate you should link a post-questionnaire. See Linking a Questionnaire for more information about questionnaires.
Setup session questionnaires for pre-post Credits & Certificates (Optional): If you would like your guests to earn credits for attending this session (e.g. PACE or CERP), then you can add certificates to this session. See Linking a Certificate for more information about certificates.
1 Certificate enabled for session
- Click "CREATE SESSION"
- If your session is not created, make sure you check any fields marked in red.
# Zoom Sessions
Zoom.us is a 3rd party Video and Meeting service provider that edropin integrates for hosting video and audio based meeting between guests.
When you launch a session with Zoom Meeting/Webinar, you will be asked to connect with your Zoom Account. This is a secure way to connect with Zoom in order to enable video meetings seamlessly.
For help with your zoom setup, simply create a case by emailing us at help@edropin.com
For uninstalling the Zoom App. Simply go to your Zoom Manage Page and Uninstall the edropin app. You will be taken to our disconnect page on edropin.
# Update a session
# Zoom Session
# In-Person Session
# Assigning certificates
# Delete a session
# Certificates
# What is an edropin certificate?
As a provider, you will work with credentialing bodies such as AGD PACE or ADA CERP to give credits for attending your courses. edropin simplifies credit assignment by providing templates for common credentialing bodies. What's more, we will be adding custom templates soon.
Every edropin certificate has 4 key components
- Certificate Template: Built-in templates from edropin that help you quickly setup a certificate for AGD PACE, ADA CERP, etc.
- Provider: Required credentialing information on the Certificate. Only needs to be provided the first time that you use a new certificate template.
- Event Information: Event/Session specific information that changes between certificates.
- Recipient: Guest information is obtained automatically from the account as needed by certificate. This means as a host you don't have to worry about membership ids, guest names, etc. They are smartly added to all certificates.
# Certificate Dashboard
You can see all certificates within an event by going to your Host Page and click on an event. From the Event Dashboard you can click Certificates or from the Sidebar > Host > Certificates.
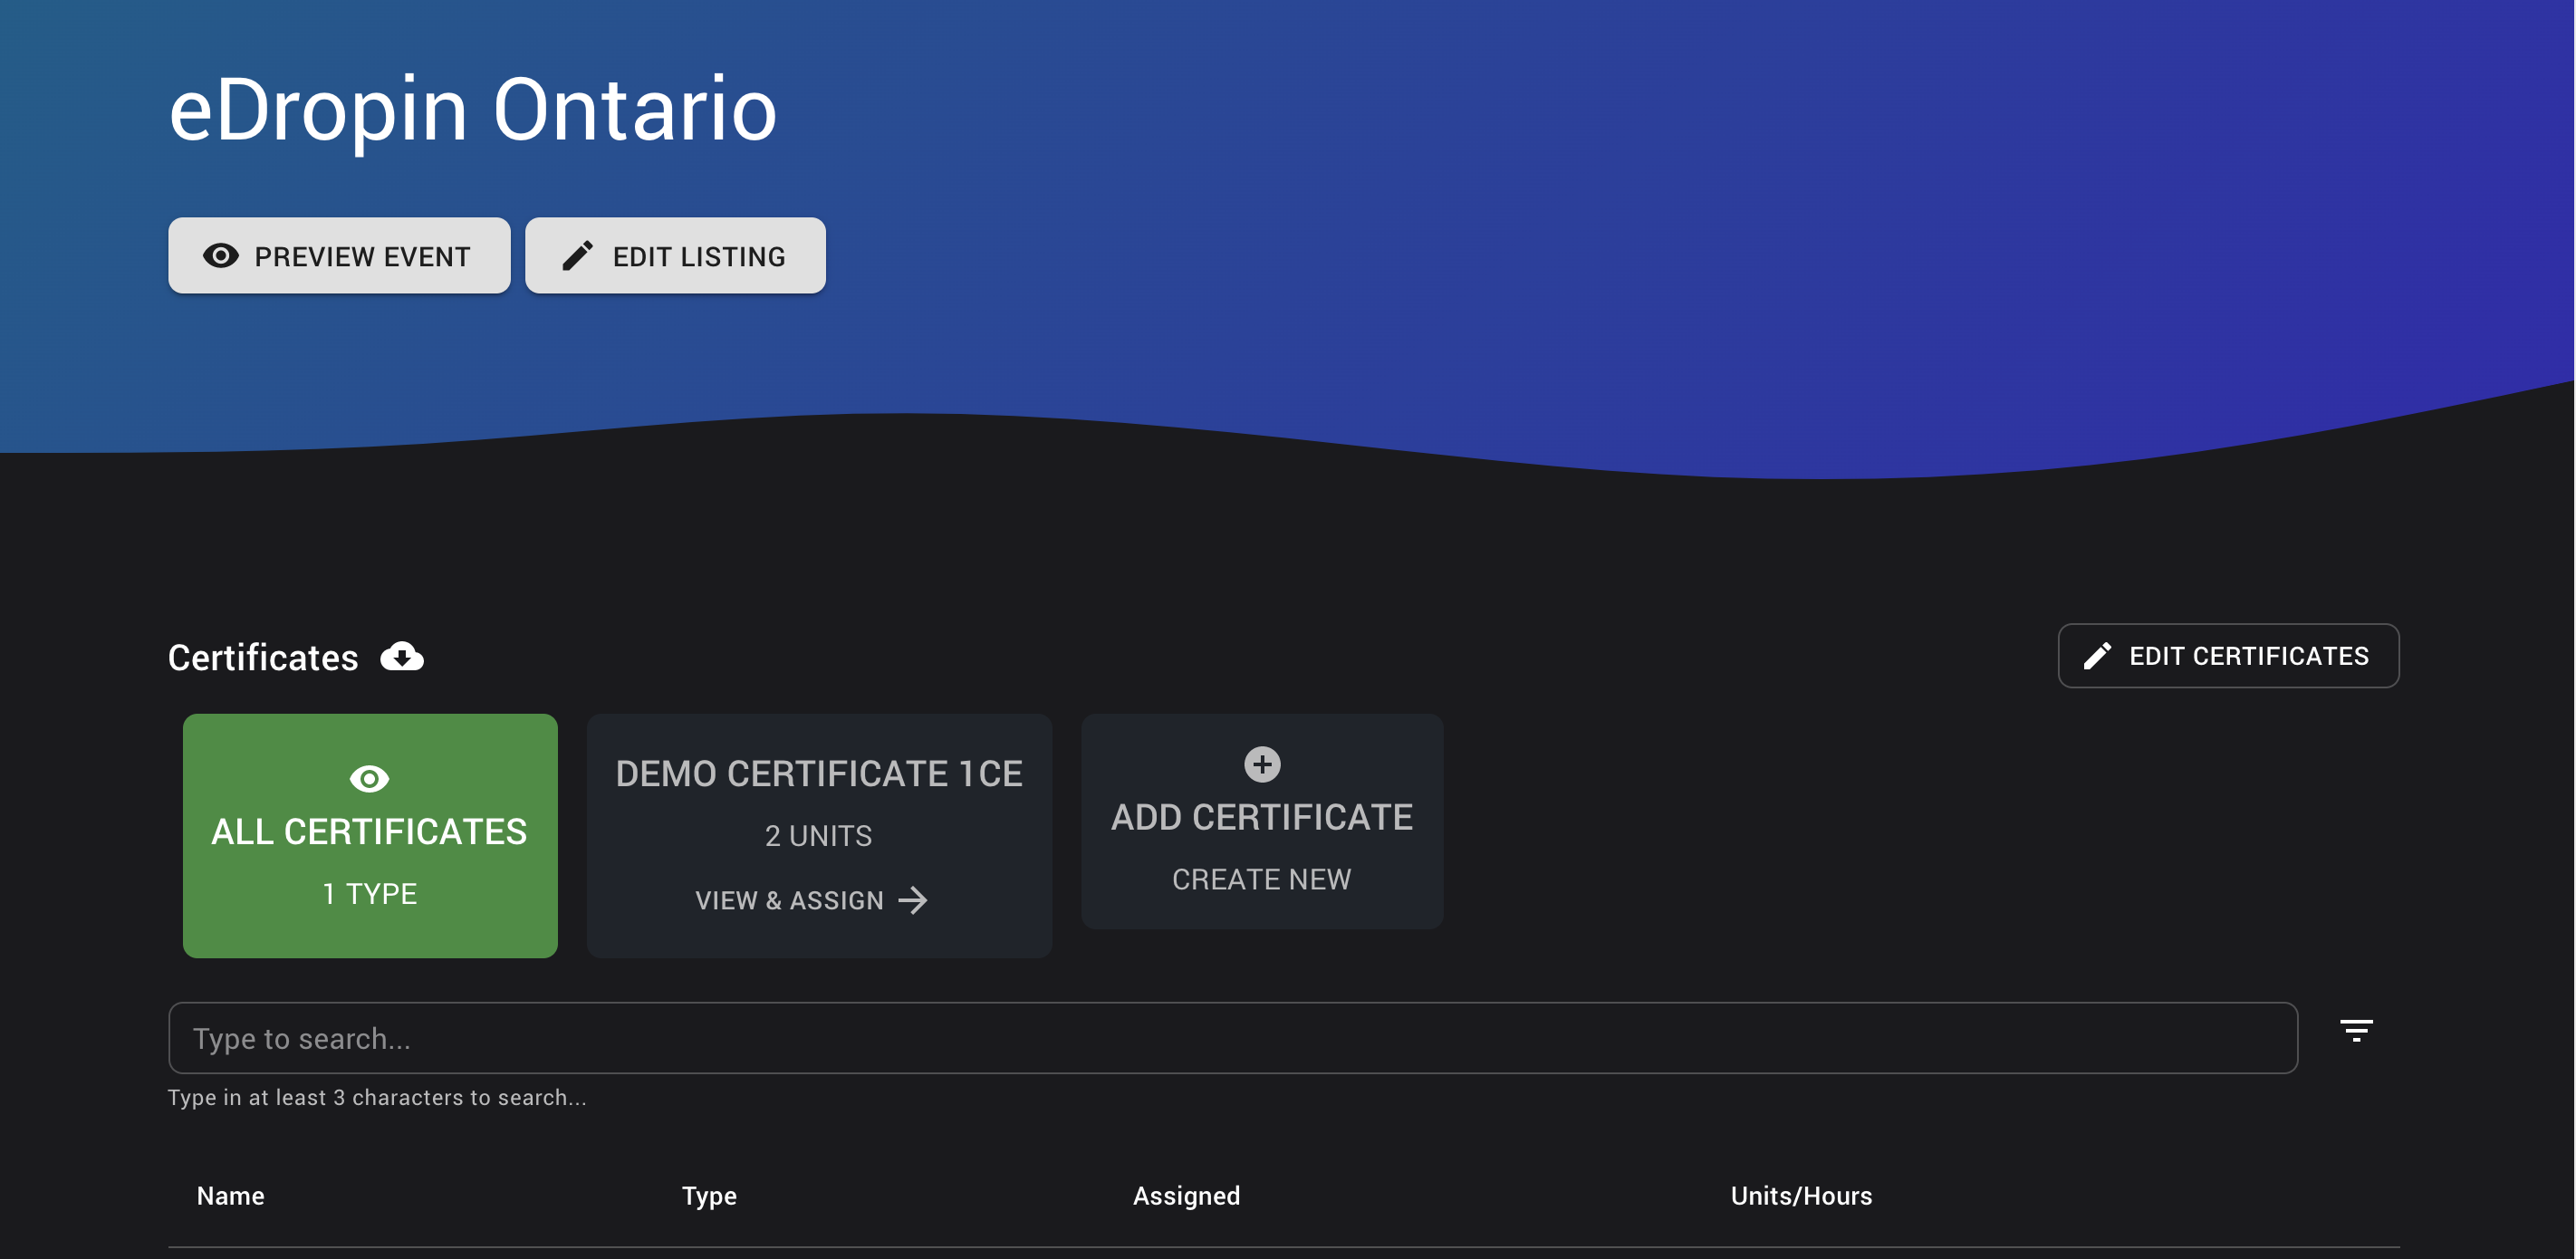
# Create a certificate
On the Certificate Dashboard click "+ Create New".
Select the template for your certificate.
If this is your first time using this template you will be asked to setup a "Provider" for your certificate
- Once you enter all the required information for the provider, you can close the new tab and go back to the Certificate setup. Your new provider should now show up on the list.

Provider for a PACE Certificate template
- Once you enter all the required information for the provider, you can close the new tab and go back to the Certificate setup. Your new provider should now show up on the list.
Click "CONTINUE" and you will now be asked for the event/session specific information for the certificate. The information required here will vary depending on the template you selected. The awesome thing with using templates is that you never miss any important information on your certificates and our templates follow the exact guidelines specified by the Credentialing body.
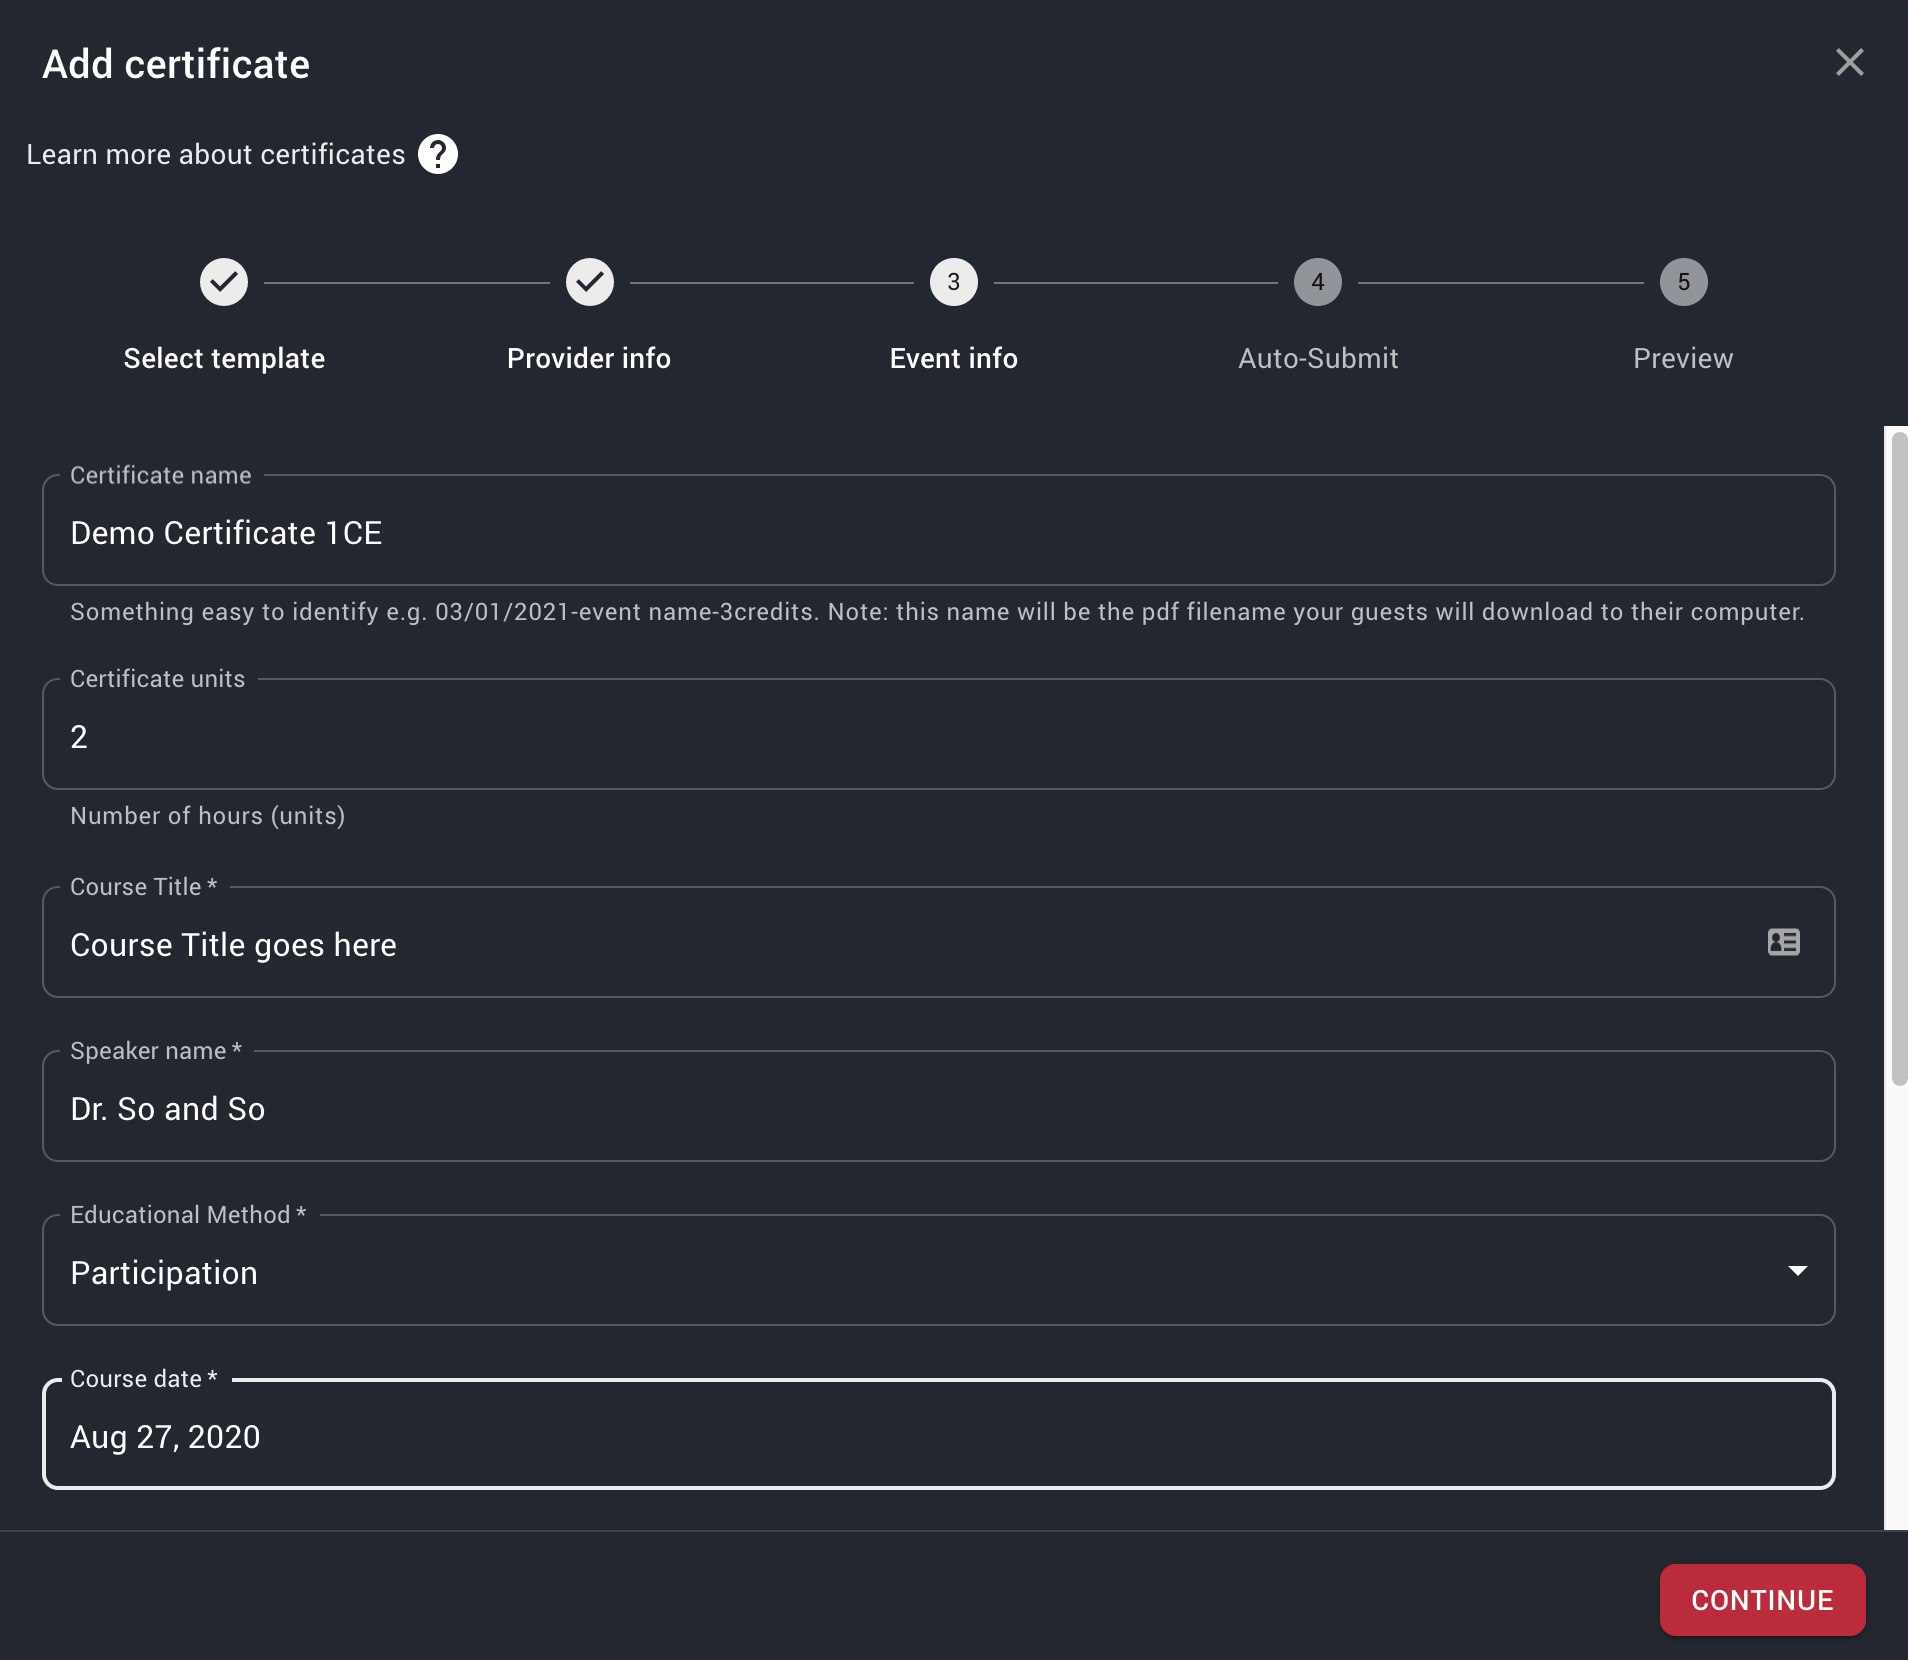
Certificate Details for an example PACE certificate as related specifically to this session/event Click "CONTINUE" and you will be asked if you would like to setup auto-submission for your certificate.
- Specific credentialing bodies will offer auto-submission features such as AGD PACE where we can submit the certificate into the PACE database on behalf of the guest and you. For this to work, you may require certain access keys. Click ADD AUTO-SUBMISSION if you would like to use this feature for this certificate.
Click "CONTINUE" to see the final preview of your certificate
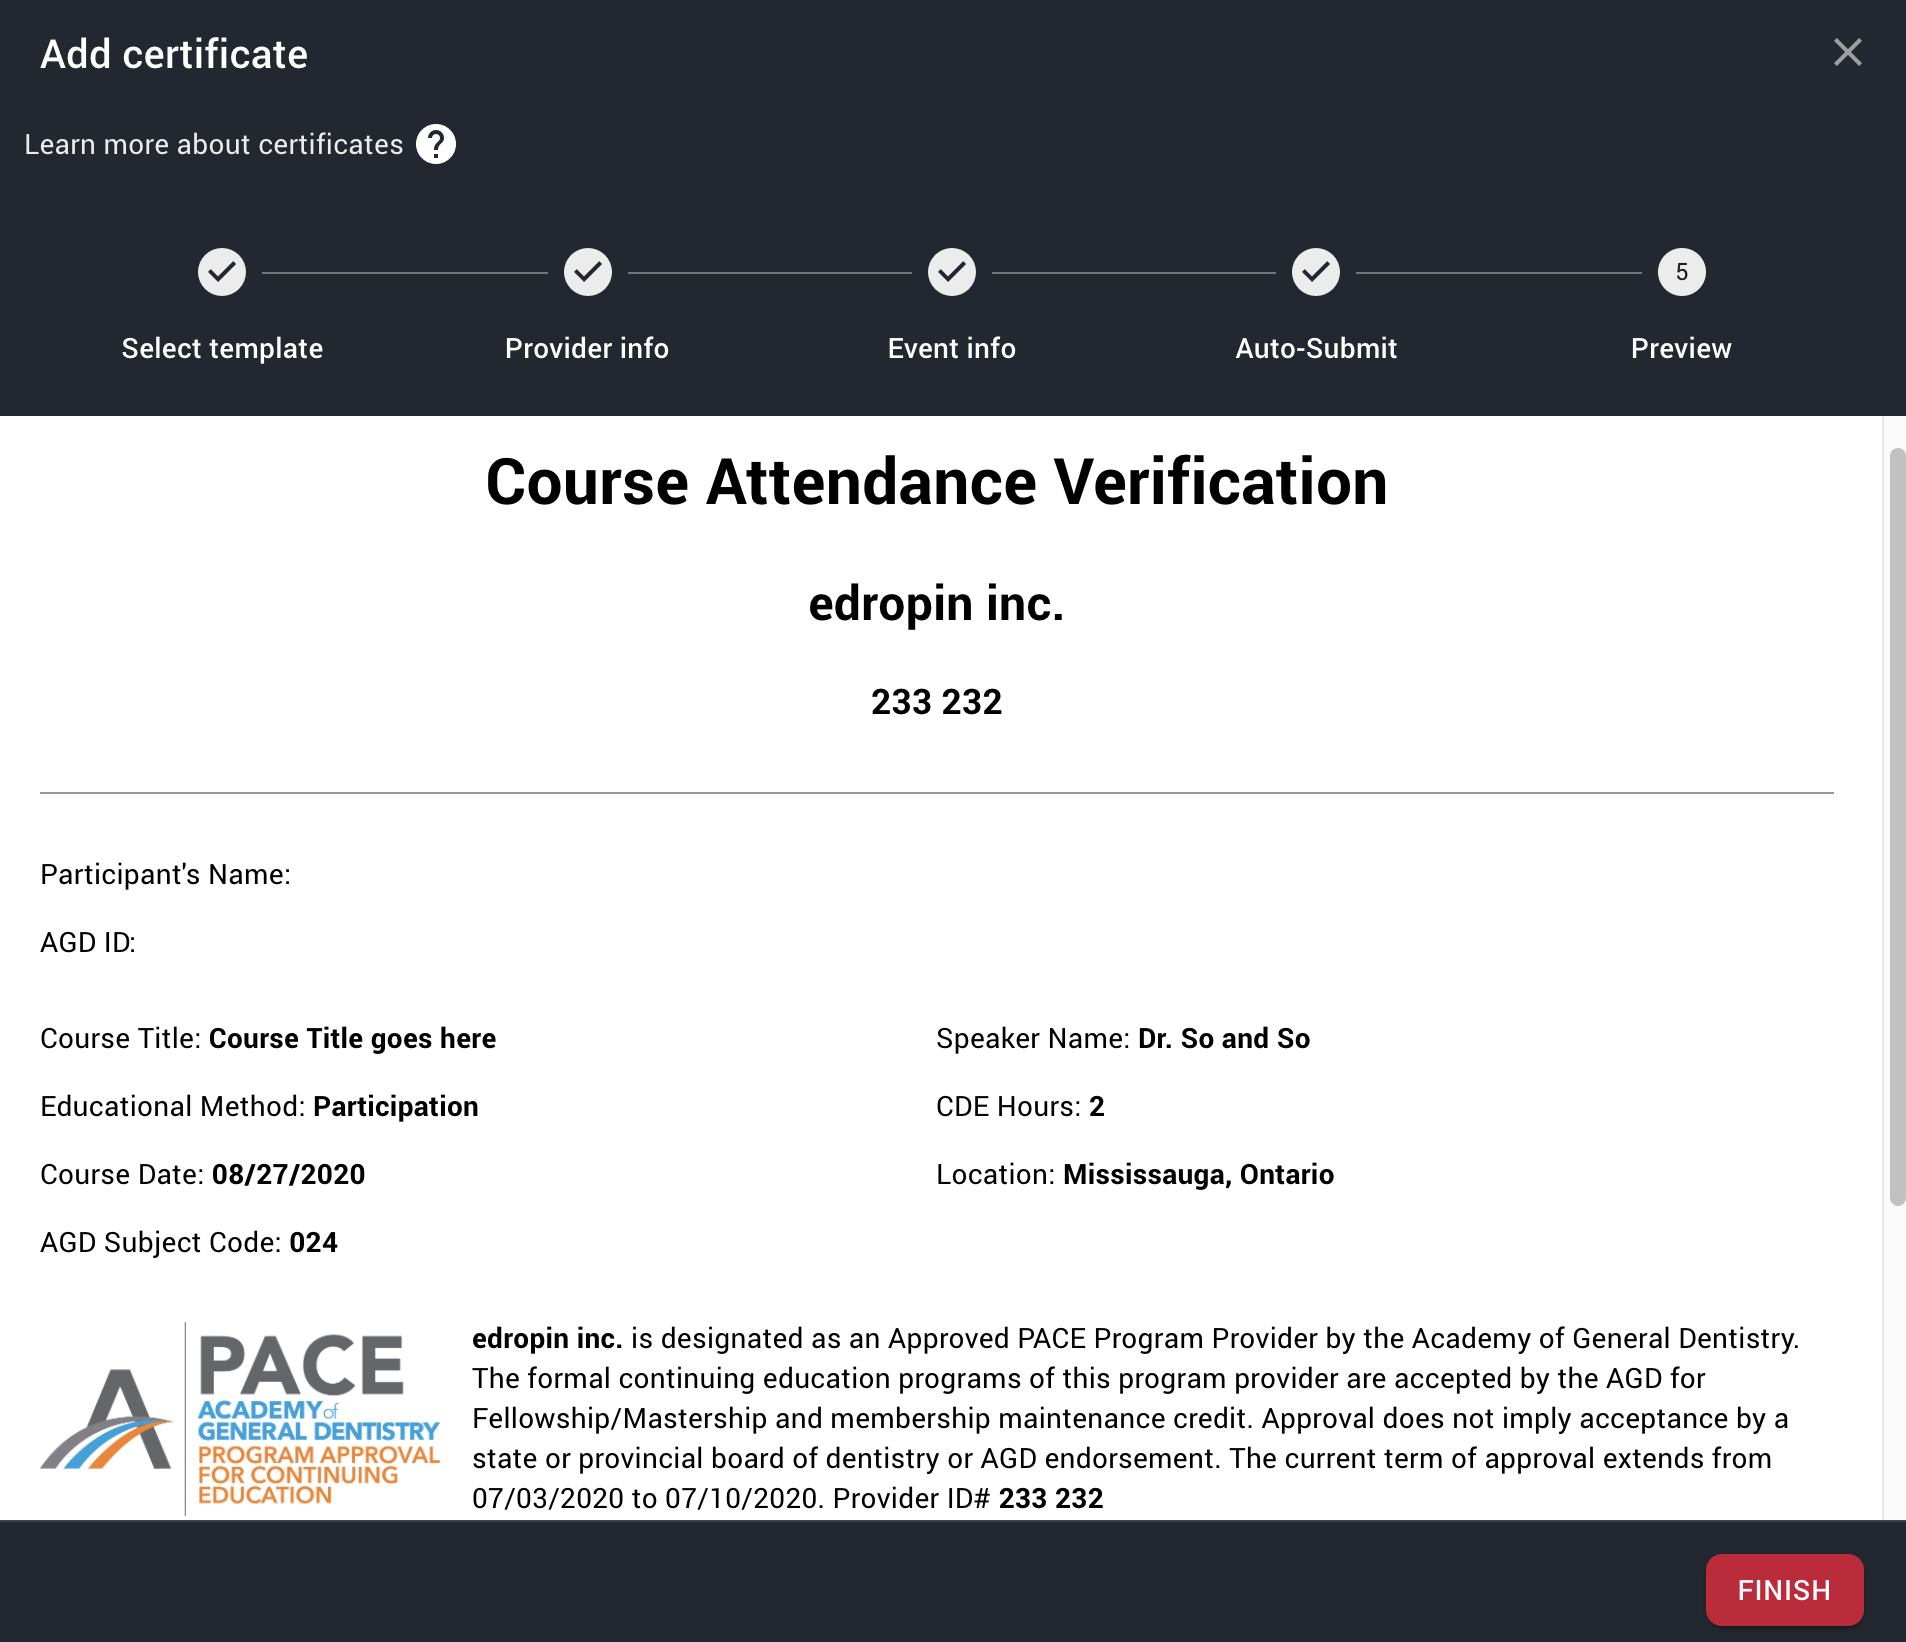
Preview of a PACE Certificate Click "FINISH" to exit the Certificate Wizard.
# Update a certificate
# Assign a certificate
# Delete a certificate
# Linking a Certificate
# Questionnaires
As an organizer, you may have specific information that you would like to collect from your guests. edropin collects basic information from guests such as first name, last name and email address, however you have the total flexibility to add custom questions.
# Where can I ask custom questions?
There are 3 unique places in edropin where you can ask custom questions from your guests.
- During checkout/point of sale
- Before the start of a session
- After the end of a session
# Checkout/Point-of-sale questions
To add custom questions to your checkout, you will link them to a Ticket. If you already have tickets for an event, you can head over to the Hosted Tickets page from the Sidebar.
- On the Hosted Tickets page, simply search for your ticket.
- Click the more button (three vertical dots) at the end of the row for the right ticket.
- If you are on a small screen, you may have to scroll the table to the right to see the More Button.

Hosted tickets page
- If you are on a small screen, you may have to scroll the table to the right to see the More Button.
- Select Questionnaire.

Adding questionnaire to a ticket - If you have created a previous questionnaire that you would like to re-use, you can click "Use Existing", otherwise select "Create New".
# Creating a questionnaire
There is a variety of question types that you can add in your questionnaires.
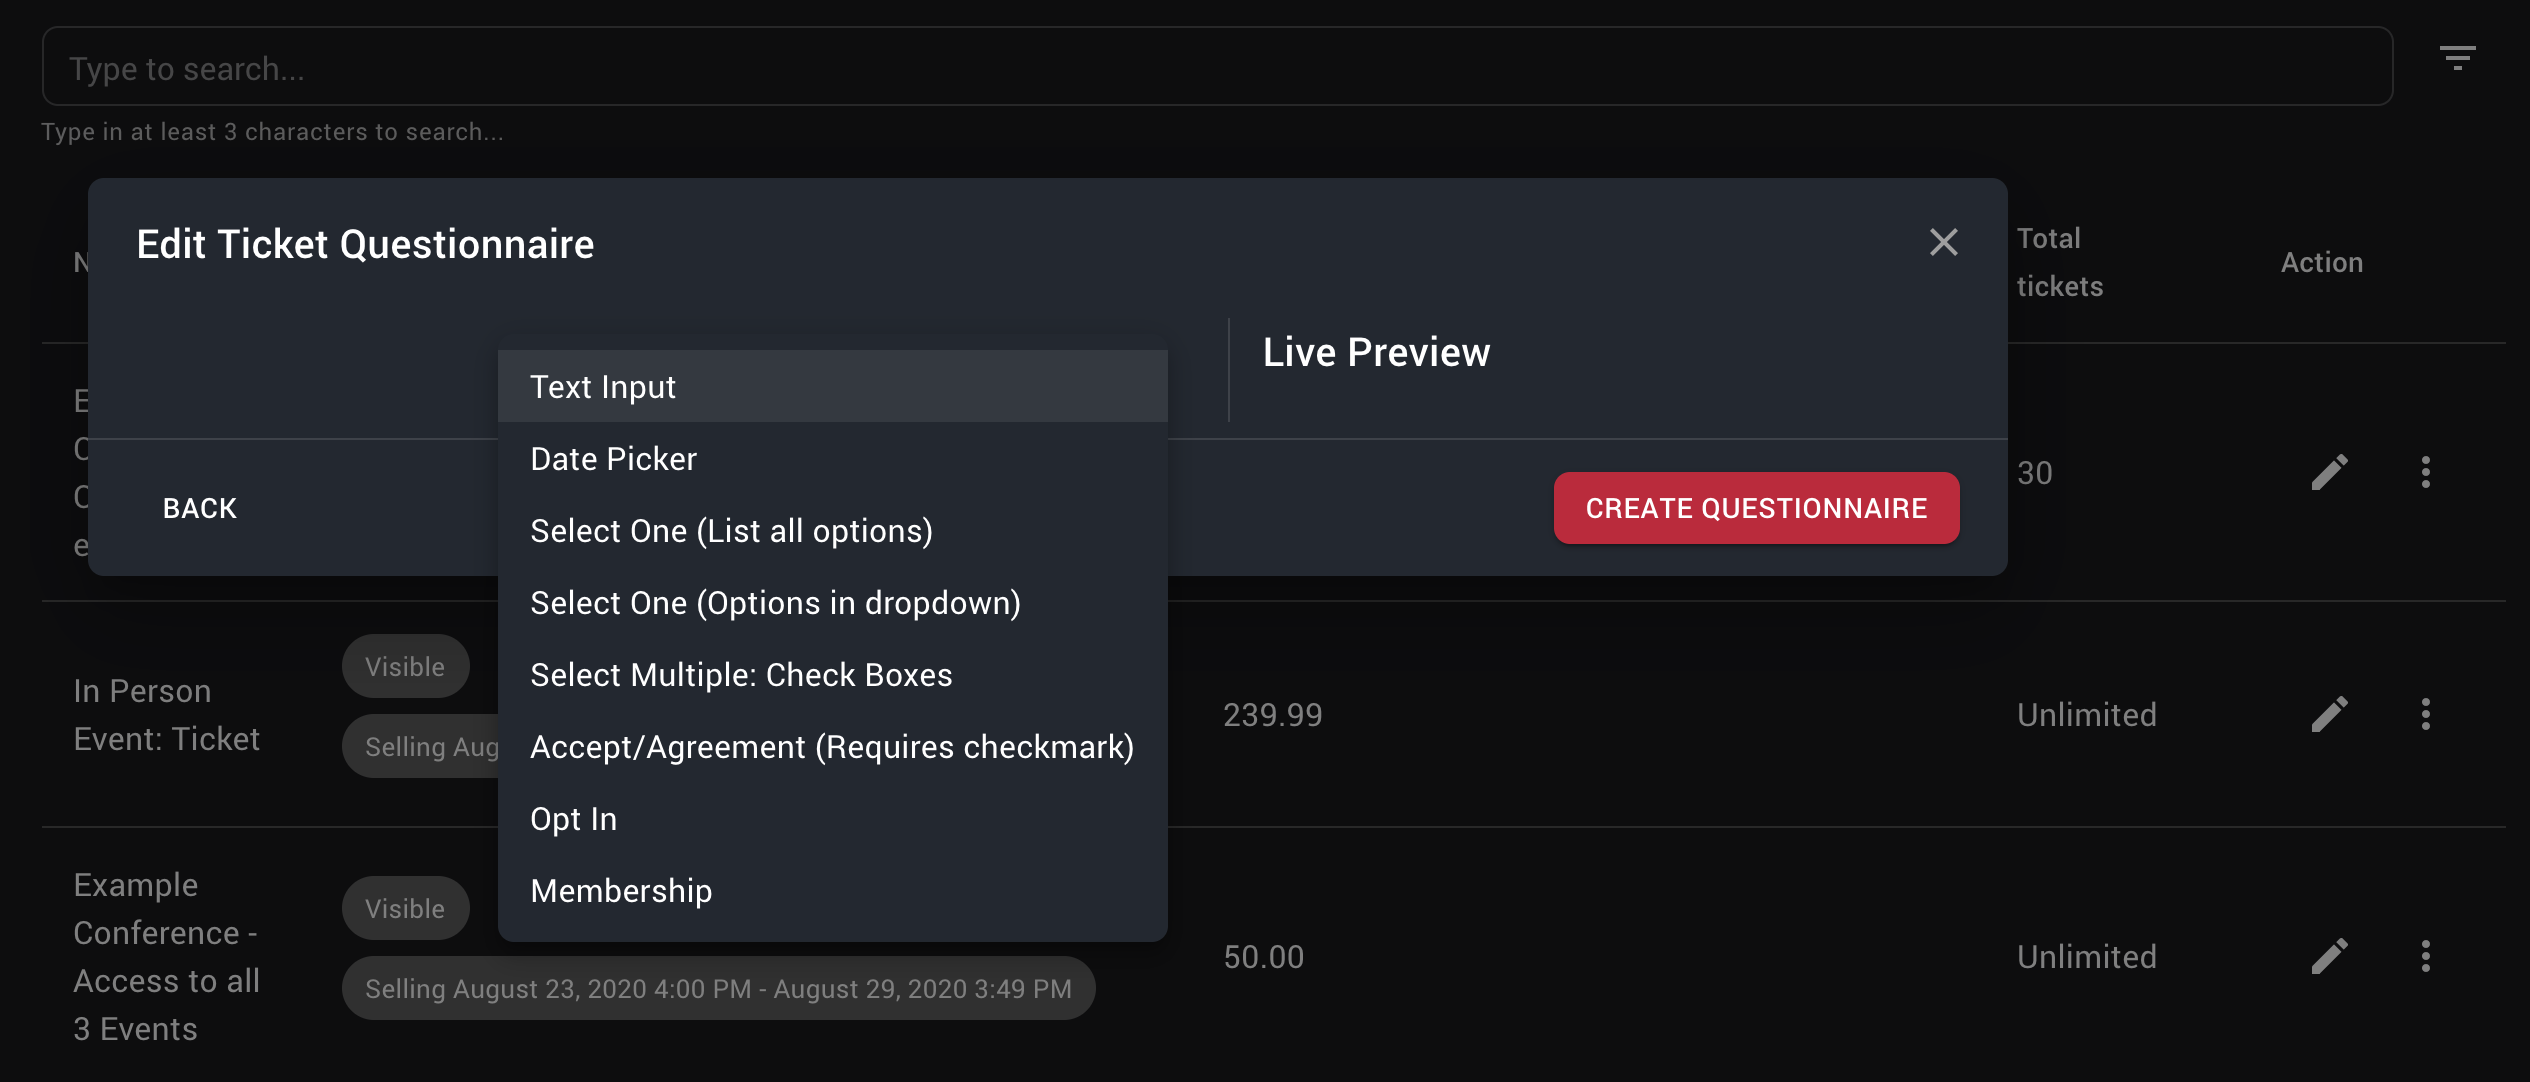
# Available types of questions
- Text Input: Simple free-form text box. e.g. Feedback/comments
- Date Picker: Great for having guests use a date picker widget. e.g. Date of birth
- Select One (List all options): When you want your users to pick only one option out of a selection. This will show the user all options so it is only recommended when you have 3-5 choices. e.g. Gender question
- Select One (Options in dropdown): Great if you have a lot of options as it will collapse them into one dropdown. E.g. Select year between 1991-2020
- Select Multiple: Check Boxes: If you want your guests to be able to choose multiple options
- Accept/Agreement (Requires checkmark): Guests will have to agree with this to proceed. e.g. waivers
- Opt In: Guests can choose to check this or proceed without opting-in. e.g. Newsletter opt-in
- Membership: Enables you to collect AGD PACE, ADA CERP and other membership info from your guests. You do not need to use this for certification, only use this option if you want to collect membership information for your own records.
# Pre-session questionnaire
Similar to checkout/point-of-sale questionnaire, you can link a questionnaire to the start of any session on edropin. This questionnaire will be presented to guests the moment they "Start" the session.
For Zoom Sessions, guests will have to answer this questionnaire before they can access the link to the meeting.
See Create a session for details on how to link a pre-session questionnaire to a session.
# Post-session questionnaire
Similar to checkout/point-of-sale questionnaire, you can link a questionnaire to the end of any session on edropin. This questionnaire will be presented to guests the moment they "Finish" the session.
For Zoom Sessions, guests will have to answer this questionnaire right after they "Finish Session" and before any Certificates are assigned.
See Create a session for details on how to link a post-session questionnaire to a session.
# Viewing/Exporting responses
Usually you will want to view the responses from your guests to your custom questions